Webhooks: Use Webhooks to Import & Update Orders
Add webhooks to import and update orders
Webhooks allow you to send order information to Postsale when an event occurs in your sales channel, such as when a new order is placed or when an order is updated.
This article will guide you through how to add webhooks in Postsale. See our Webhooks: Manage Your Webhooks help article for information on how to edit your existing webhooks.
Before We Begin
-
Adding Webhooks is a premium feature requiring the Soar billing plan. Learn more about managing your Postsale account in our Frequently Asked Questions.
-
This article assumes that you have a general knowledge of using webhooks. It also assumes that:
- Your sales channel supports the ability to create webhooks.
- Order information from your sales channel can be sent as JSON when a new order is created or when an order is updated.
-
You can create as many webhooks as you need. For example, you may create one webhook to send newly created orders to Postsale, and a second to send order updates.
-
Webhooks can be used to send information to Postsale only. They cannot be configured to send information from Postsale back to your sales channel.
Add Webhooks to Postsale
Real World Example
We would like to use webhooks to send new order data to Postsale when a new order is placed in our sales channel.
Quick Tip Video
Here's a Quick Tip video that quickly covers the information in the rest of this help article.
1 - Send a Test Webhook
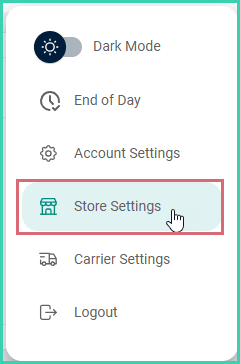
Go to Settings.

Select Store Settings.
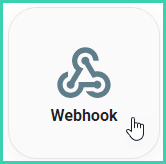
Select Webhook.
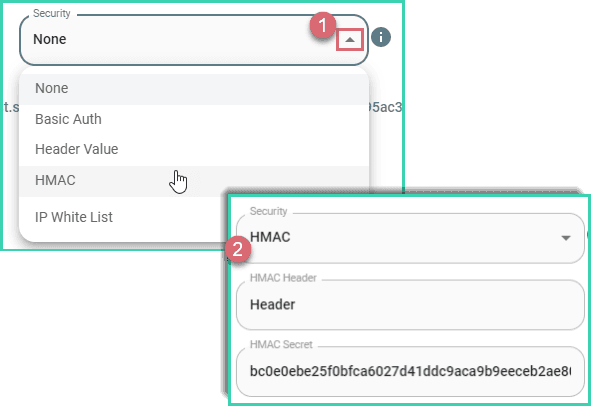
Select the webhook security type used by your sales channel from the Security drop-down menu. Then enter the correct values for the selected security type.
Select from:
- Basic Auth: Specify the Username and Password to authenticate the request.
- Header Value: Specify the header and header value used to authenticate the request.
- HMAC: Specify the HMAC Header and HMAC Secret Key used to authenticate the request.
- IP White List: List of IP addresses from which requests are allowed.
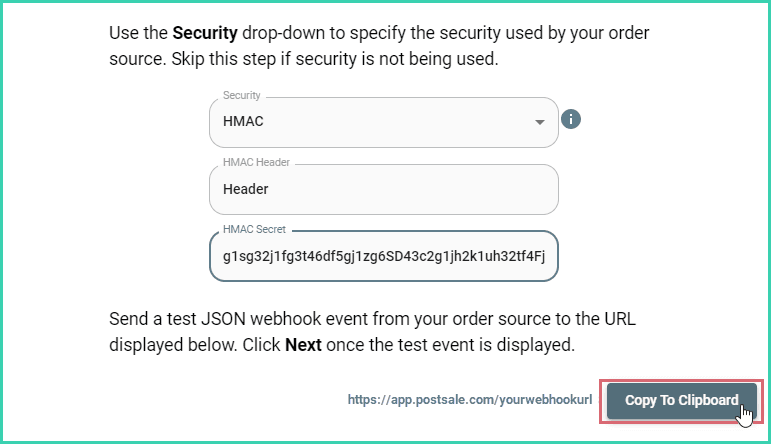
Click the Copy to Clipboard button to copy the Postsale webhook URL.
Open your sales channel admin in a new web browser window and create a new webhook. The steps to create a webhook and the options available when creating it will vary by sales channel. However, be sure to:
- Specify whether the event that triggers the request is when a new order is created or when an order is updated.
- Select JSON as the webhook format.
- Paste the URL you copied in step 5 into the new webhook.
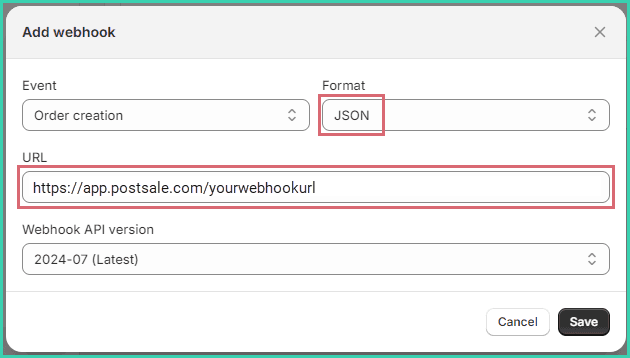
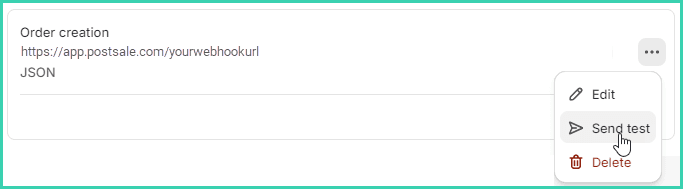
Follow the steps for your sales channel to send a test to Postsale for the webhook you just created.
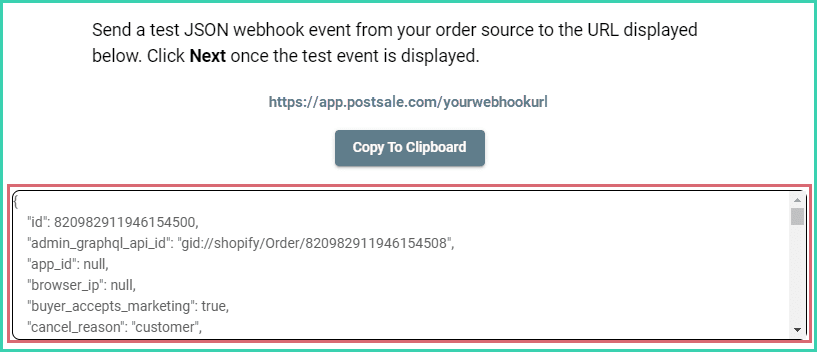
Switch back to Postsale. After a few moments, a sample web request will display in the webhook window.
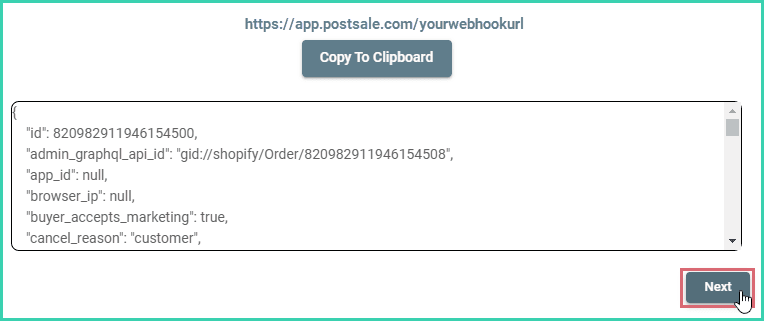
Click Next to begin mapping.
2 - Map the Request to Postsale
The next step is to map the information in the webhook request to the fields the data should be imported into in Postsale.
Helpful Tips Prior to Mapping
Here are a few tips that may prove helpful during the process of reviewing and updating your mapping:
-
Postsale updates existing orders by matching the Source and the Order Number included in webhook events to the Order Number and Source associated with the orders in Postsale. If Postsale finds a match, then the order is updated with the information contained in your file. Otherwise, when no match is found, a new order is created.
-
The mapping screen breaks the data down into separate sections (Order, Address, Items, Charges, and so on). For each section, the number of successfully mapped fields is displayed.
When you select a section, only the fields in Postsale that relate to that section are shown. This helps to organize and simplify the mapping process.
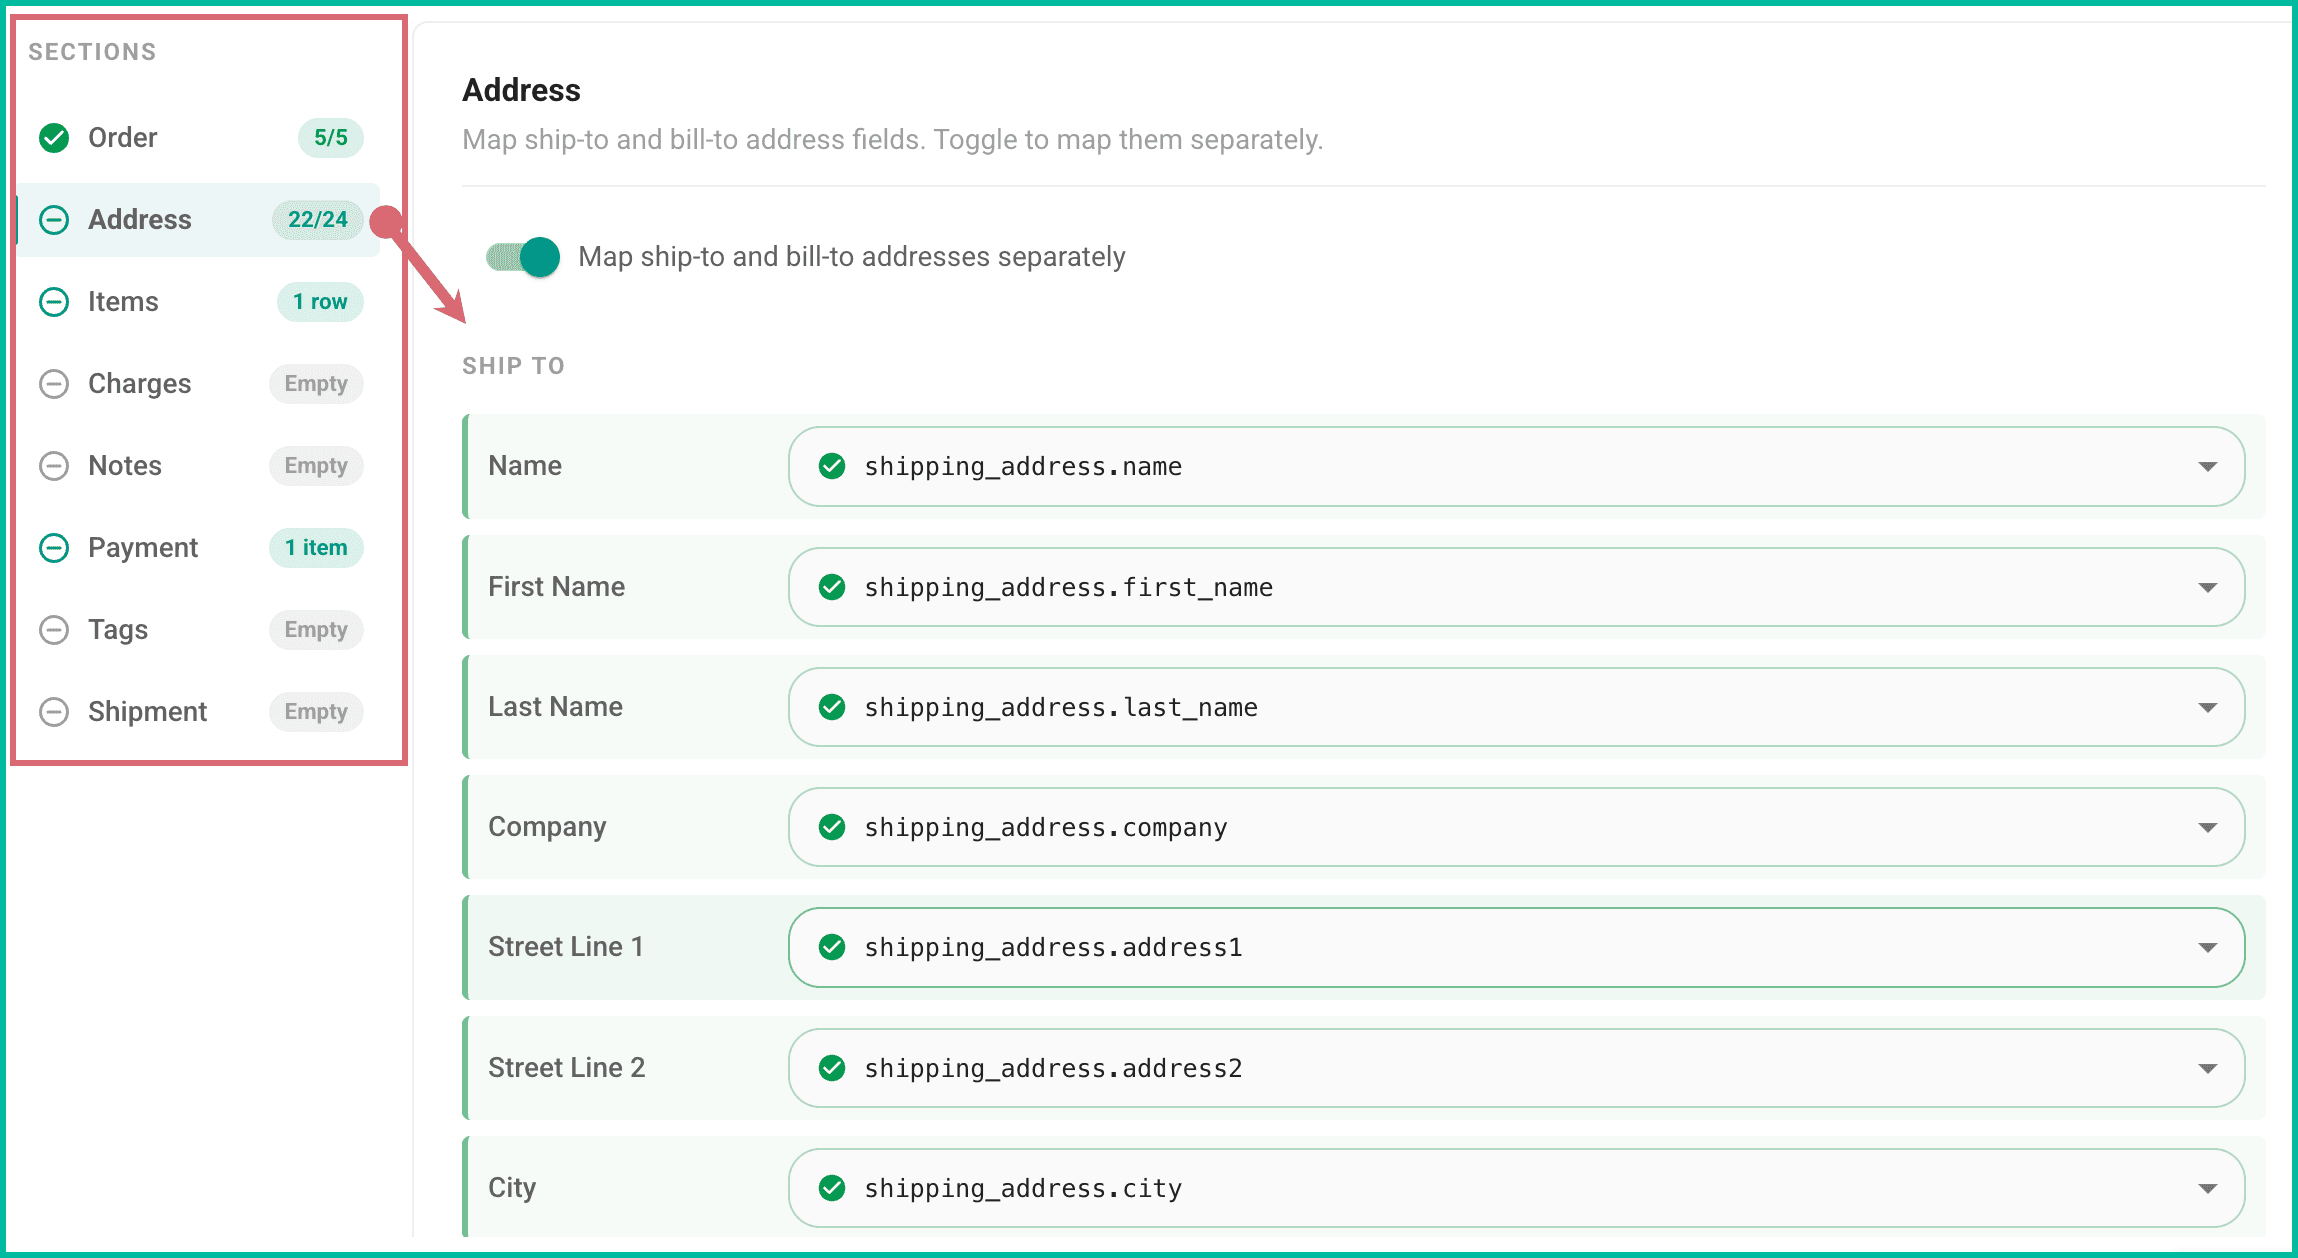
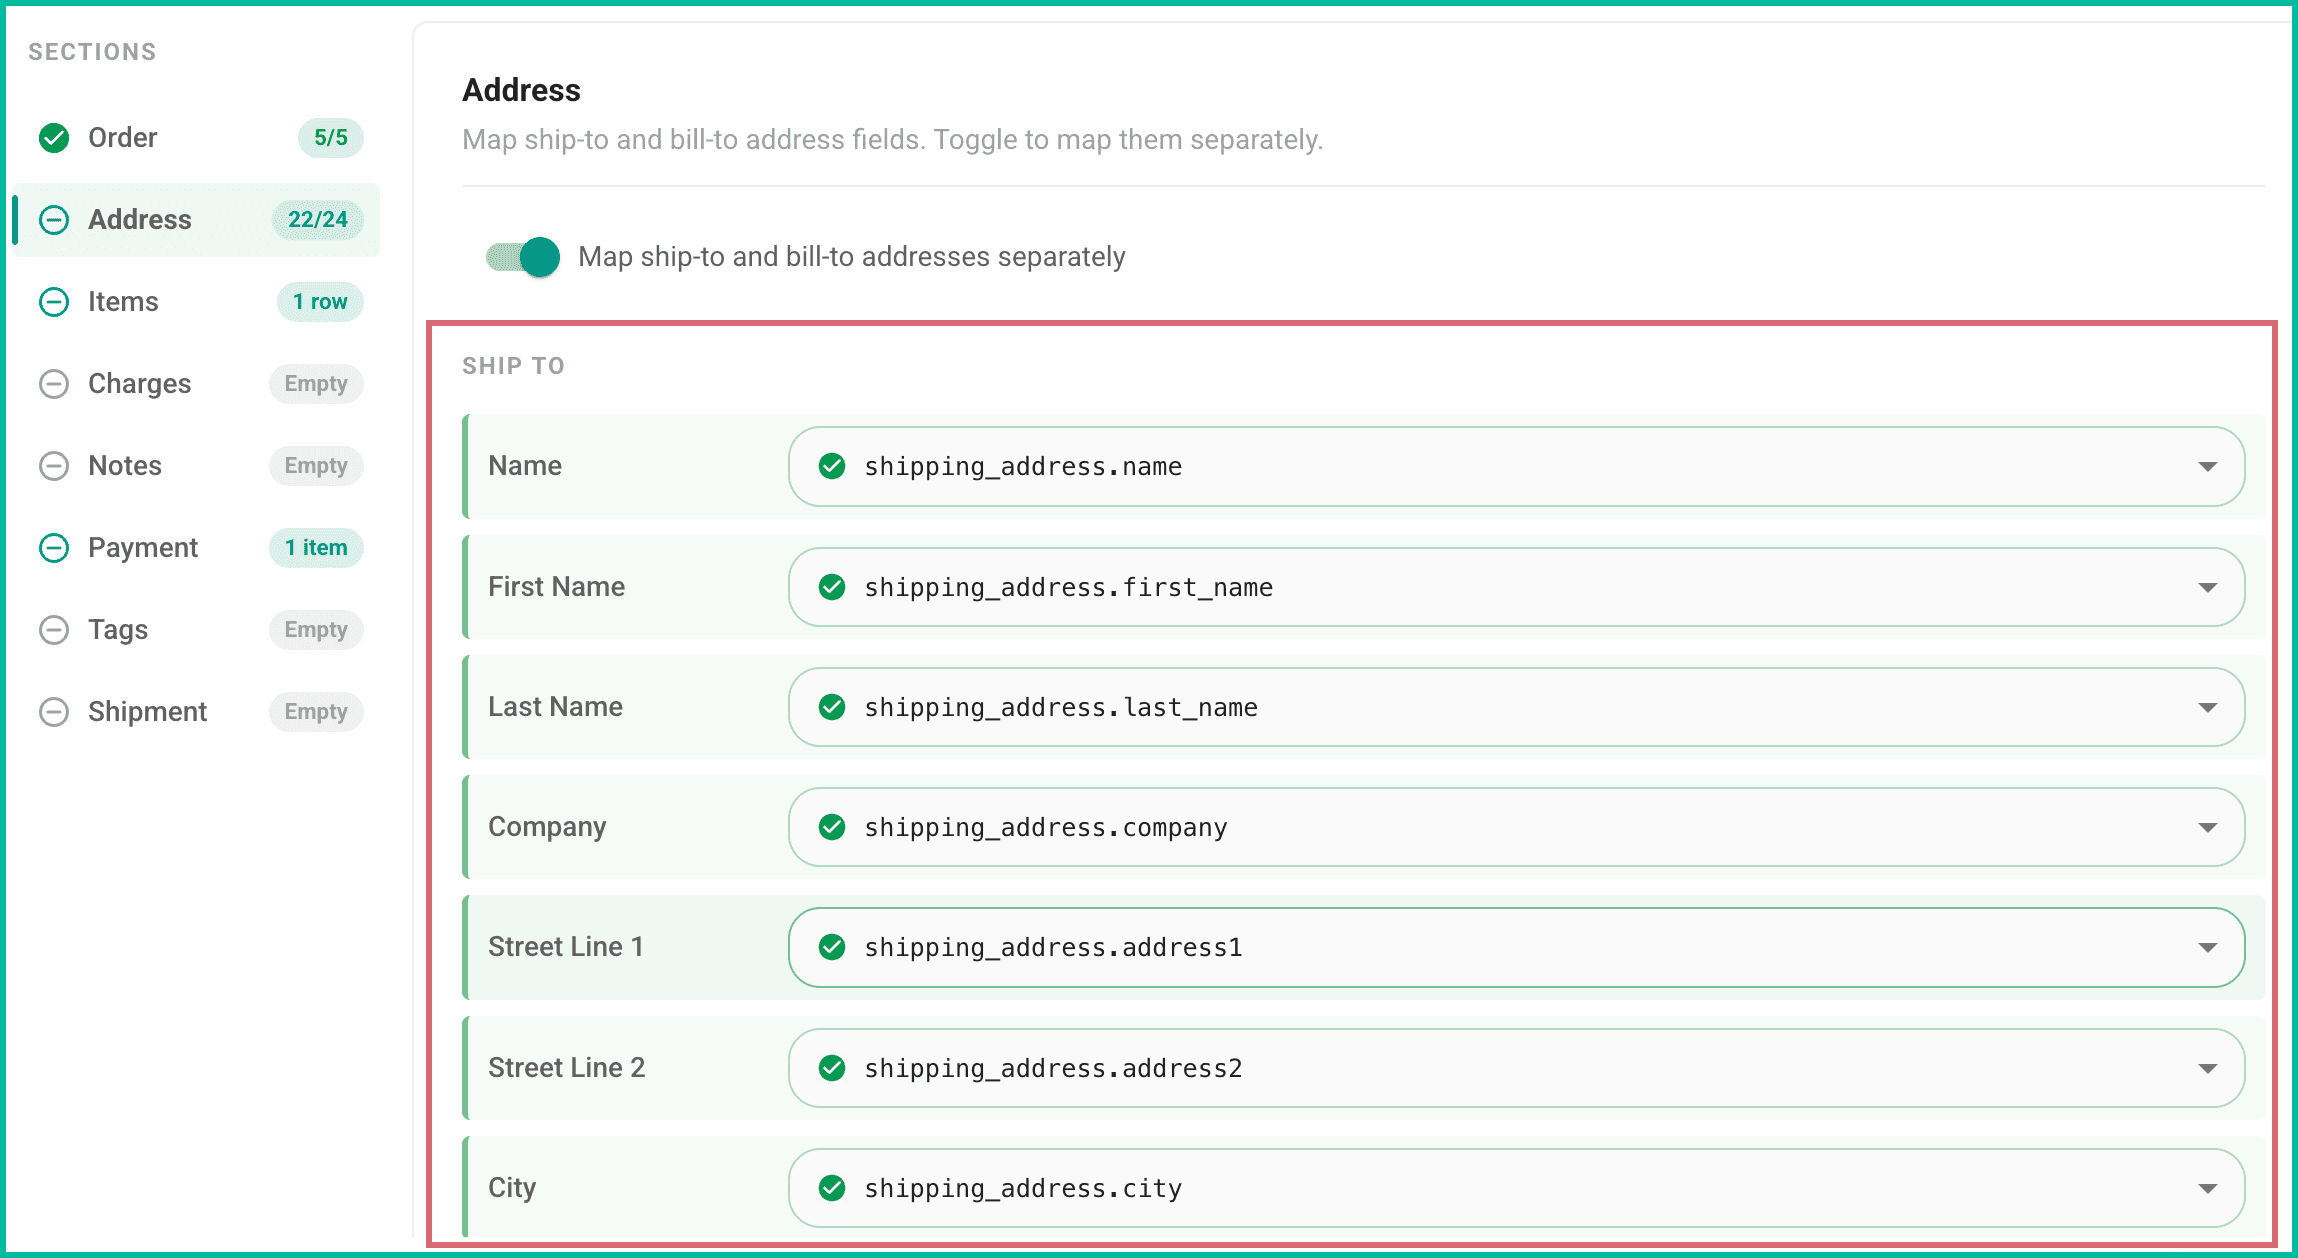
- The sections of the mapping screen are displayed in two columns:
-
The fields in Postsale
-
The JSON paths included in the webhook event, selectable from the drop-down menu
The mapped and the unmapped fields are clearly identified for you.
-
-
When needed, you can map the same column in your source file to multiple fields in Postsale. The columns in your source file that are available to map, as well as those already mapped and in use, are clearly identified for you.
-
The webhook map can be edited at any time. This is useful when the data sent to Postsale via the webhook request has changed and needs to be mapped to Postsale fields.
Review and Map Your File
You're now ready to begin reviewing the auto-generated map and updating it as needed. We've listed specific, helpful information for each mappable section below.
Order Section
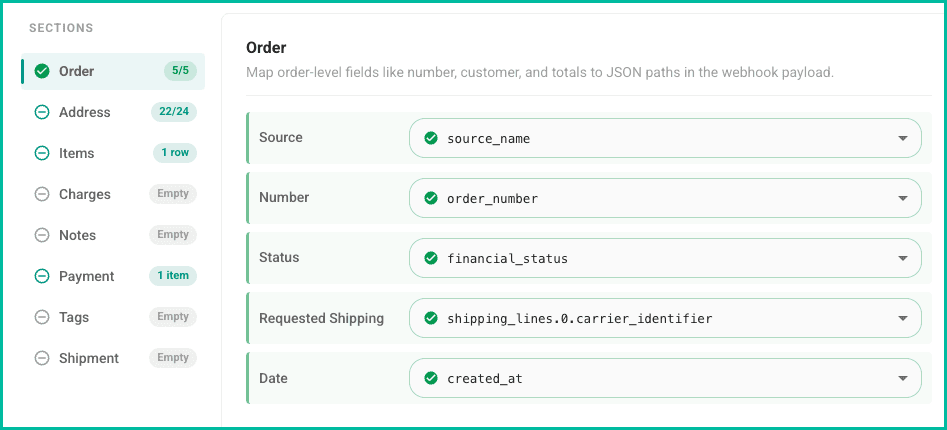
The Orders section defines general order information:
Mappable Fields
- Source: Identifies the sales channel/order source for the order. When mapped, the Source and Number fields are used together to uniquely identify an order in Postsale.
- Number: The order number/ID of the order. Used to uniquely identify orders in Postsale. If the Number field is unmapped or if no order number is imported, Postsale will auto-generate sequential order numbers for you.
- Status: Identifies the status of the order. (shipped, not shipped, backordered, etc.)
- Requested Shipping: Indicates the shipping method your customer requested.
- Date: The date the order was placed.
Address Section
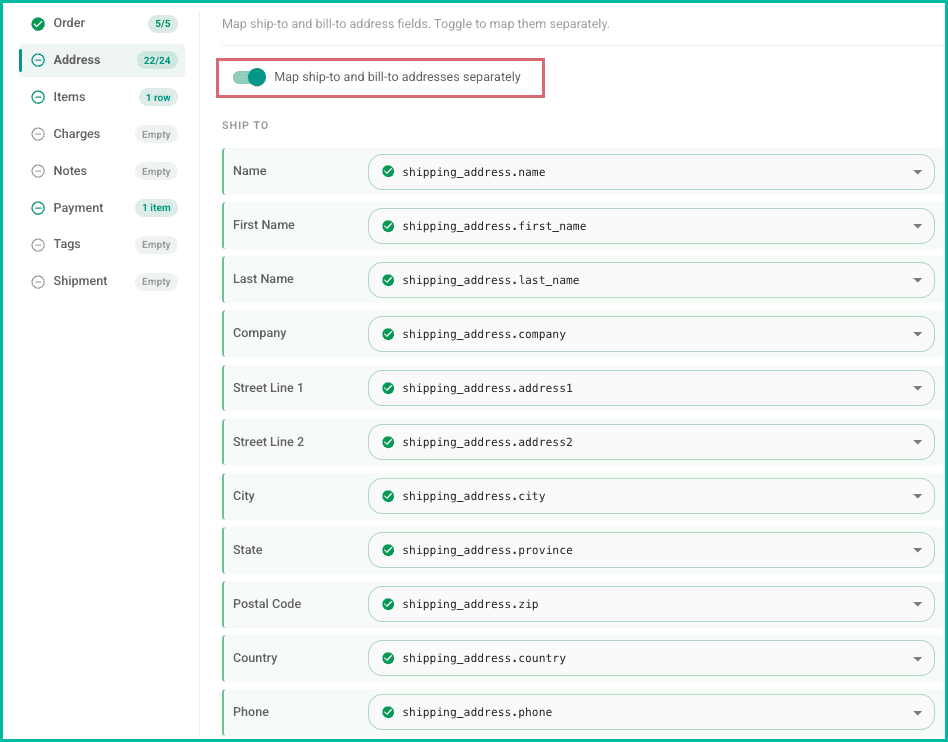
The Ship To and Bill To addresses are mapped together by default. Enable the Map ship-to and bill-to addresses separately option to map them independently.
Items Section
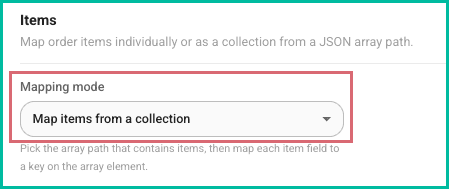
Use the Items section to map the details of the items on your orders. There are two line item strategies available:
- Map items in a collection: Use this option if all items on the order are contained in a single array.
- Map items individually: Use this option if each item on the order is listed individually.
Select the correct option from the Item Mapping drop-down menu. Then, follow the steps below for the strategy that matches how your request is configured.
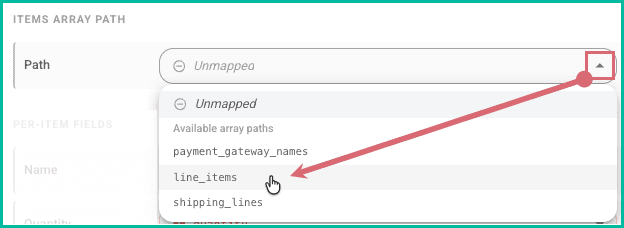
Map Items in a Collection
Map the Items Path to the array in your request that contains all of the item information.
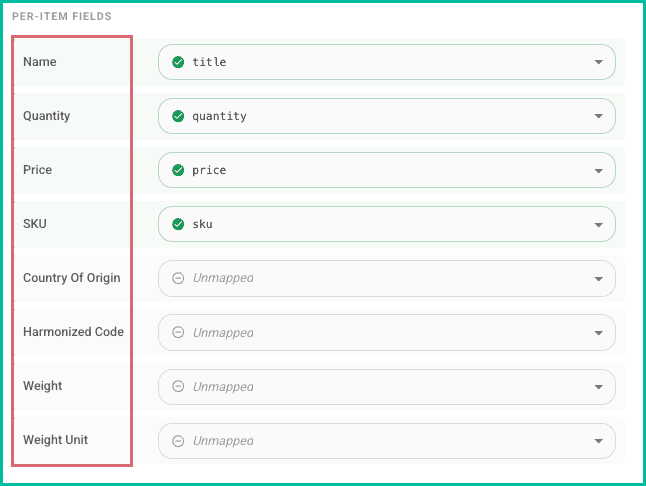
Then, map the remaining fields in the Items section to the correct elements in your request.
Map Items Individually
Map items for the maximum number of line items on a single order.
For example: If the largest order contains 3 different items, follow these steps to add and map three individual items:
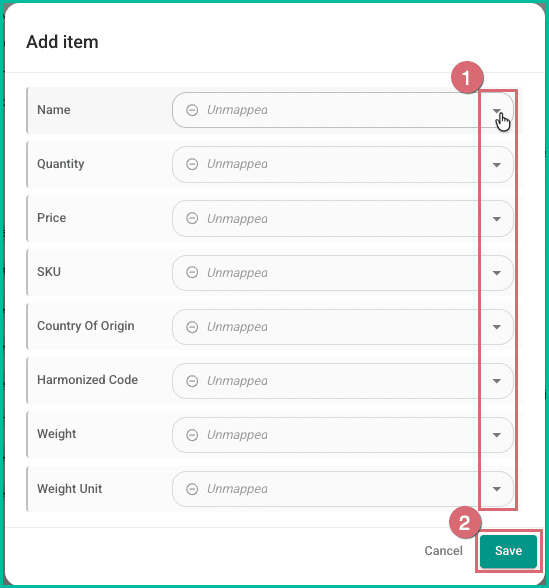
Click the Add button.
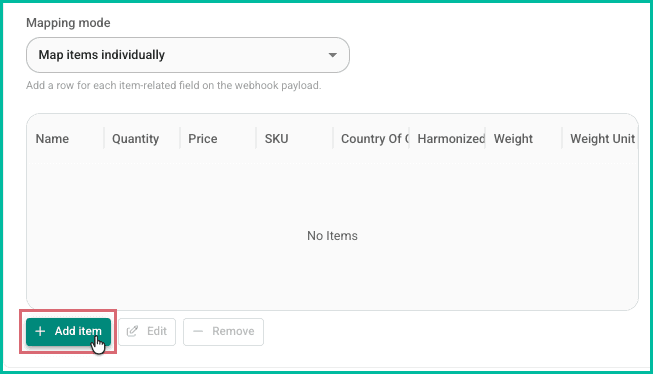
Map the Postsale item fields to the correct elements in your request. Then, click Save.
Charges Section
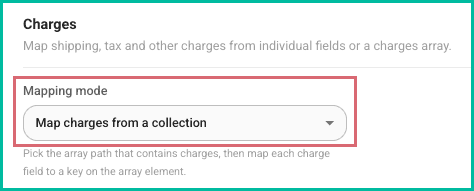
Use the Charges section to map the details of the charges on your orders, such as Tax or Shipping. There are two strategies available:
- Map charges in a collection: Use this option if all charges on the order are contained in a single array.
- Map charges individually: Use this option if each charge on the order is listed individually.
Select the correct option from the Charge Mapping drop-down menu. Then, follow the steps below for the strategy that matches how your request is configured.
Map Charges in a Collection
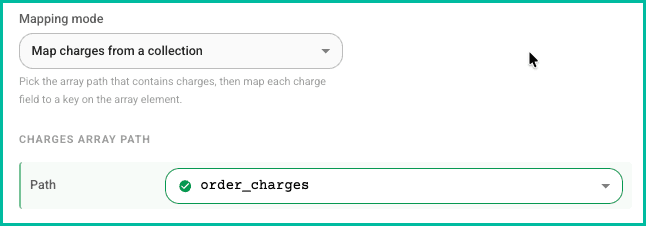
Map the Charges Path to the array in your request that contains all of the charge information.
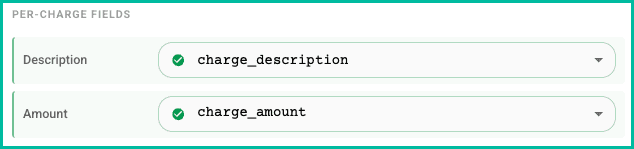
Then, map the remaining fields in the Charges section to the correct elements in your request.
Map Charges Individually
Click the Add button.
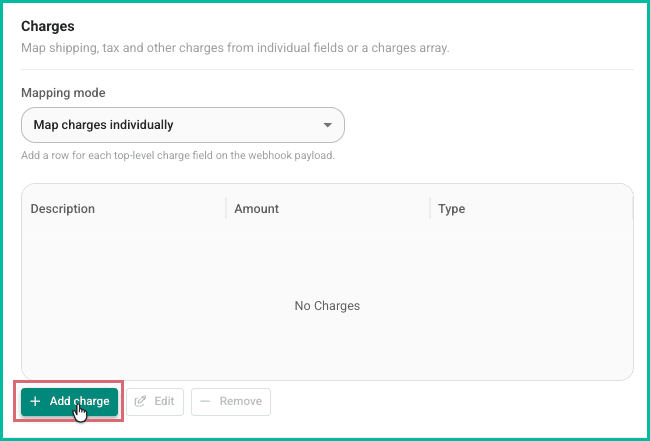
Map the following fields:
a. Description: Map to the field in your file that describes the additional charge on the order.
b. Amount: The amount of the additional charge.Select the type of charge from the Type drop-down menu. If no Type is selected, Postsale will attempt to identify and apply the correct charge type based upon the charge's Description.
Click Save.
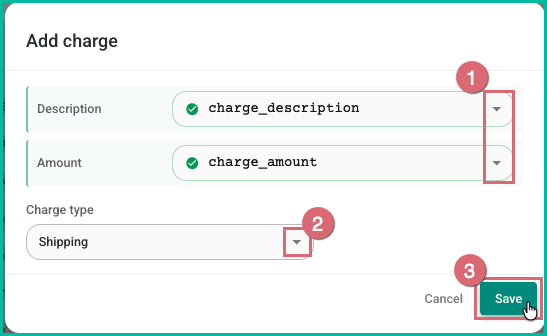
Add as many charges as you need to for the orders in your file.
Notes Section
Use the Notes section to map the details any notes associated with your orders. There are two strategies available:
- Map notes in a collection: Use this option if all notes associated to the order are contained in a single array.
- Map notes individually: Use this option if each note on the order is listed individually.
Select the correct option from the Note Mapping drop-down menu. Then, follow the steps below for the strategy that matches how your request is configured.
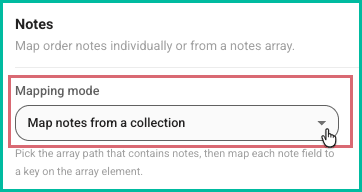
Map Notes in a Collection
Map the Notes Path to the array in your request that contains all of the note information.
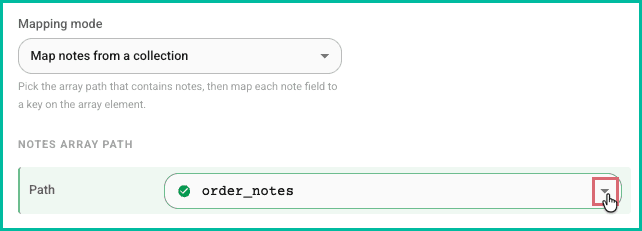
Then, map the remaining fields in the Notes section to the correct elements in your request.
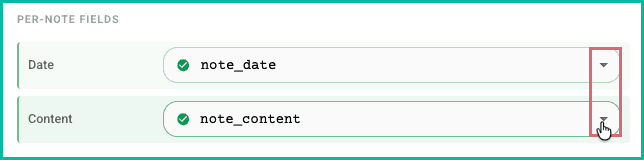
Map Notes Individually
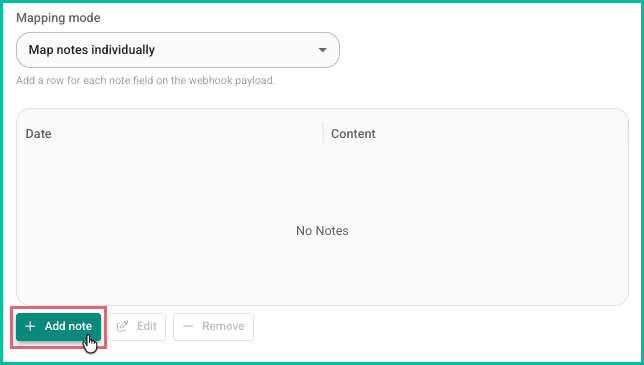
Add a map for each note associated with your orders.
For example: If you have a thank you message to your customers and an internal note for each order, you will add two note mappings.
Click the Add button.
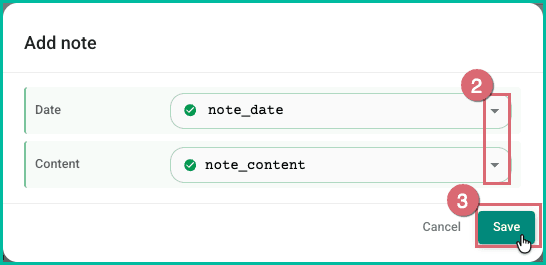
Map the Date and Content fields. When the Date field is left unmapped, Postsale assigns the current date as the import date.
Click Save.
Payment Section
Use the Payment section to map the Payments and additional Payment Details for orders in your source file.
Payment
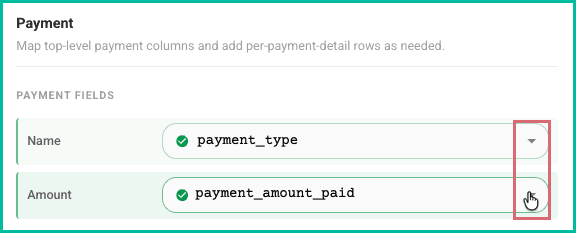
The payment fields are used to map the actual payment type and payment amount.
Map the Name and Amount fields.
- Name: Map to the column in your file that contains the payment type. (PayPal, Credit Card, etc.)
- Amount: Map to the column that contains the payment amount.
Payment Details
Think of Payment Details as important information related to the Payment itself, such as the type of credit card used or the last four digits of a credit card number, etc.
There are two strategies available when mapping additional payment details:
- Map payment details in a collection: Use this option if all payments associated with the order are contained in a single array.
- Map payments individually: Use this option if each payment on the order is listed individually.
Select the correct option from the Payments Mapping drop-down menu. Then, follow the steps below for the strategy that matches how your request is configured.
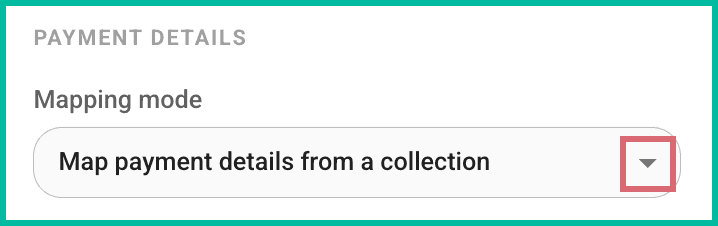
Map Payments in a Collection
Map the Payments Path to the array in your request that contains all of the payment information.
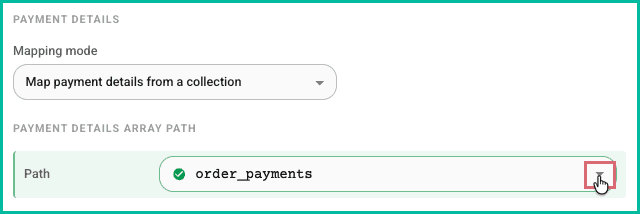
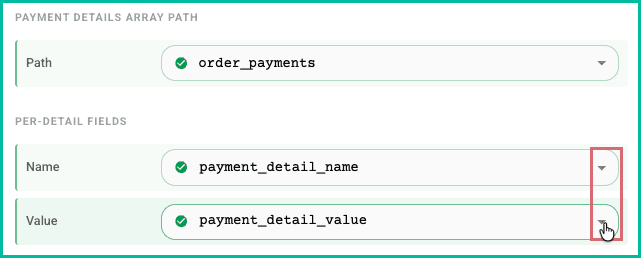
Then, map the remaining fields in the Payments section to the correct elements in your request.
Map Payment Details Individually
Click the Add button.
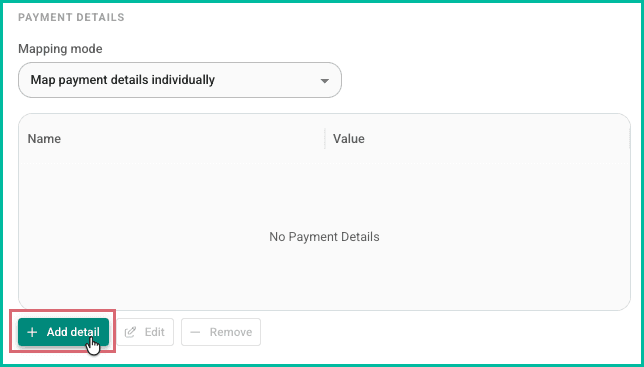
Map the Name and Value fields. Then, click Save. The additional payment details have been added.
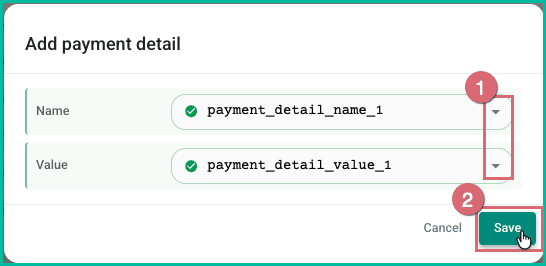
Repeat steps 1 and 2 to add multiple payment details.
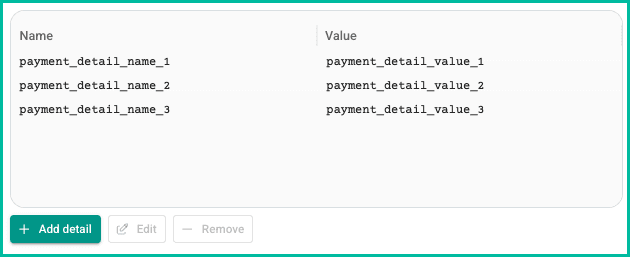
The mapped payment details will be listed in the Payment Details section.
Shipment Section
The Shipment section allows you to map the shipment and package details for each order in your webhook request to the appropriate shipment and package fields in Postsale so that a shipment is automatically created for each order.
This has several, powerful advantages:
- It saves time. You won't need to create a shipment for each order.
- You can preview and select rates for each shipment as soon as the orders are added to Postsale.
- Orders can be batch processed right away since each order is already configured with valid shipment and package details.
Shipment Mapping
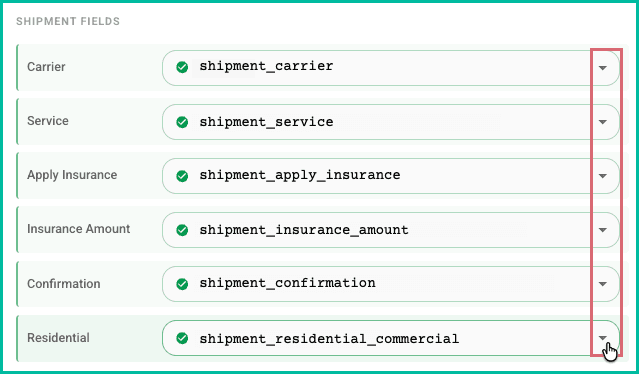
Use the Shipment Fields section to map the fields for the shipment information, such as the shipping carrier and service, insurance, shipping confirmation, etc.
Package Mapping
Correctly mapping the package information allows Postsale to associate multiple packages with a single shipment. There are two strategies for mapping package details (package type, dimensions, and weight) in the Shipment section.
- Map packages in a collection: Use this option if all package information is contained in a single array.
- Map packages individually: Use this option if each package is listed individually.
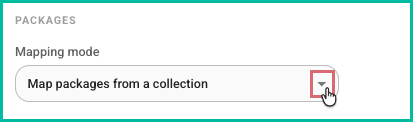
Select the correct option from the Shipment Package Mapping drop-down menu. Then, follow the steps below for the strategy that matches how your request is configured.
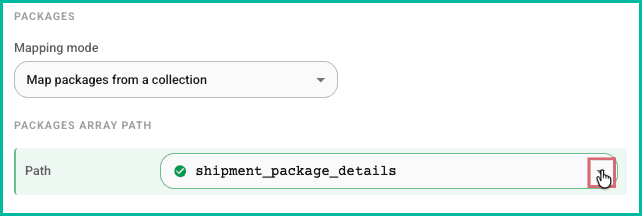
Map Packages in a Collection
Map the Packages Path to the array in your request containing all package information.
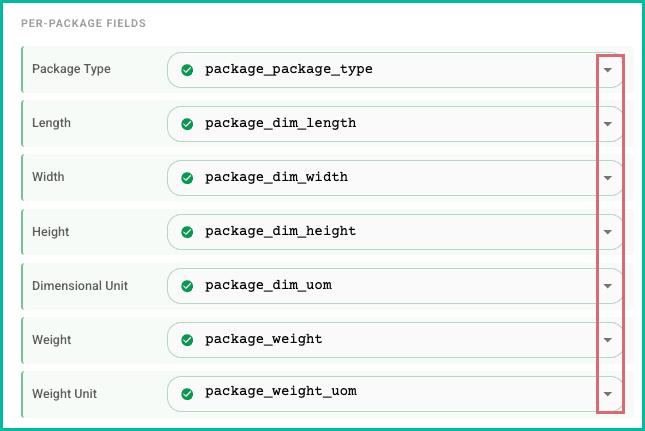
Then, map the remaining package fields to the correct elements in your request.
Map Packages Individually
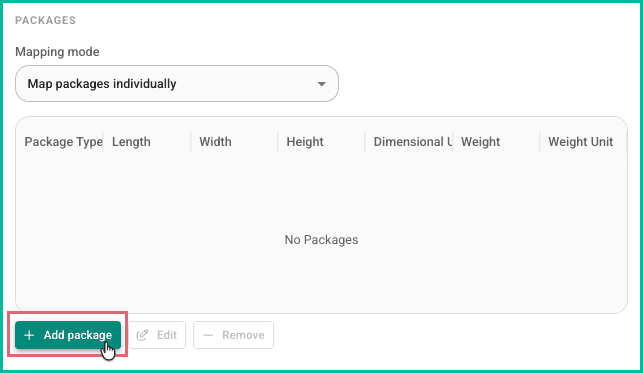
Add a package map for the maximum number of packages associated with your orders.
For example: If you ship some of your orders in 2 separate packages, you'll add 2 package mappings.
Click the Add button.
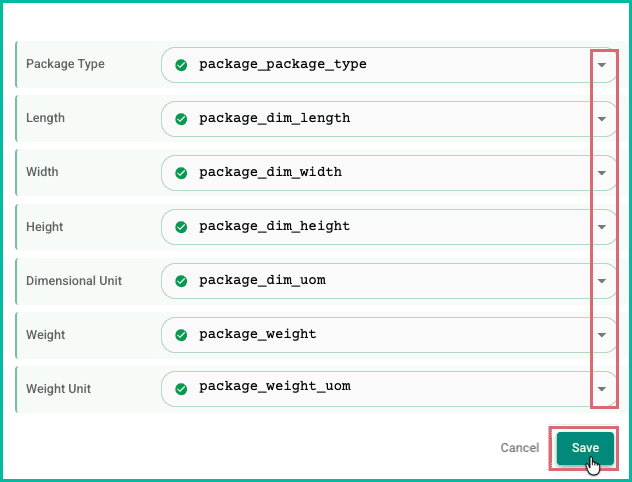
Map the package fields. Then, click Save.
Shipment and Package Field Information
The following Shipment and Package fields are available:
Fields marked with an asterisk (*) must be formatted correctly.
Shipment Fields
| POSTSALE FIELD | DESCRIPTION & VALID VALUES |
|---|---|
| Carrier* | The shipping carrier to use for the shipment. (USPS, UPS, FedEx, etc.) |
| Service* | The shipping service to use for the shipment. (UPS Ground, USPS Ground Advantage, FedEx Ground, etc.) |
| Apply Insurance | Specifies if you want to apply Shipment Protection to the shipment. Valid values:
|
| Insurance Amount | Specifies the amount of insurance to apply to the shipment when Apply Insurance is Yes. Notes:
|
| Confirmation | Determines if you wish for a shipment confirmation to be applied to the shipment. Valid values:
|
| Residential | Specifies if the Ship To address is residential. Valid values:
|
Package Fields
| POSTSALE FIELD | DESCRIPTION & VALID VALUES |
|---|---|
| Package Type* | Defines the type of package being used for the shipment. |
| Length | Specifies the length of the package. Valid values:
|
| Width | Specifies the width of the package. Valid values:
|
| Height | Specifies the height of the package. Valid values:
|
| Dimensional Unit | Defines the unit of measure used for the dimensions. Valid values:
|
| Weight | Defines the weight of the shipment. Valid values:
|
| Weight Unit | Defines the unit of measure used for the weight. Valid values:
|
Once all sections have been mapped, click the Next button to save your mapping and finish your setup.
3 - Automation, Name Your Store, Add a Logo, Store Address
Now it's time to complete your webhook store setup:
- Verify that you wish for Postsale to perform the following actions automatically. Then, click Next.
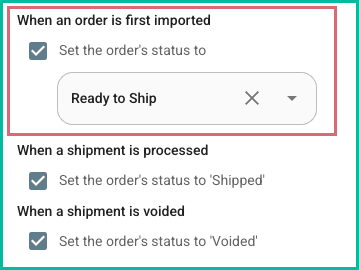
- When an order is first imported
-
Set the order's status to [select the status from the drop-down menu]
Enable this option to specify what the local status of the order should be set to when order's are imported for the first time. With this option disabled, the order's local status will be blank when imported.
-
- When a shipment is processed
-
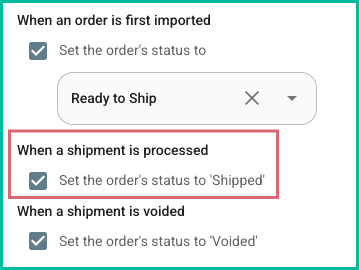
Set the order's status to ‘Shipped’
With this option enabled, Postsale will set the order's status to ‘Shipped’ when a label is created for the order.
-
- When a shipment is voided
-
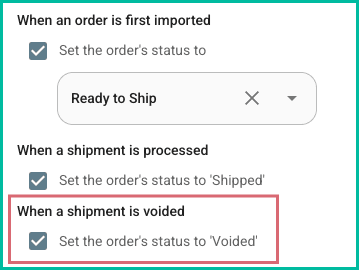
Set the order's status to ‘Voided’
With this option enabled, Postsale will set the order's status to ‘Voided’ when a shipment is voided for the order.
-
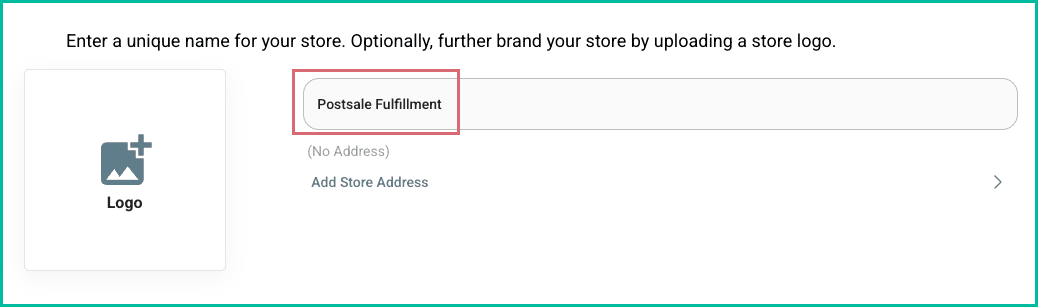
Enter a name for this webhook connection into the Store Name field.
(Optional) Click the Logo tile. Then, select an image file (png or jpg) from your computer.
- Postsale supports JPEG and PNG files with a recommended size of 3 MB or less.
- Larger image files will be reduced to the maximum file size of 3 megabytes when uploaded.
- The image will be uploaded and become the logo for your webhook connection.
- The logo will automatically display in Postsale templates that include a logo, such as the Invoice with Logo template.
- Learn about editing an image in Postsale
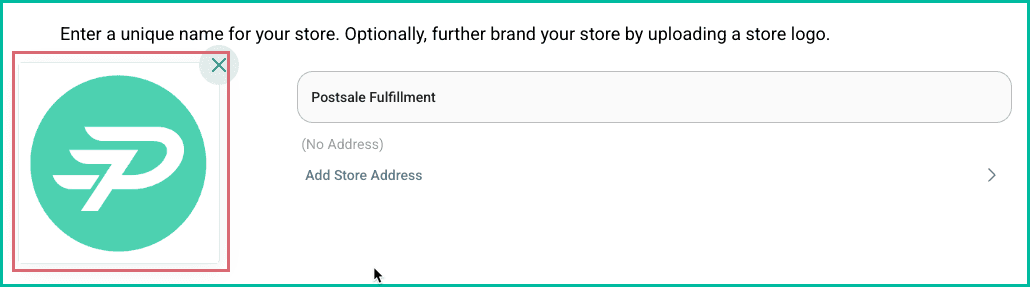
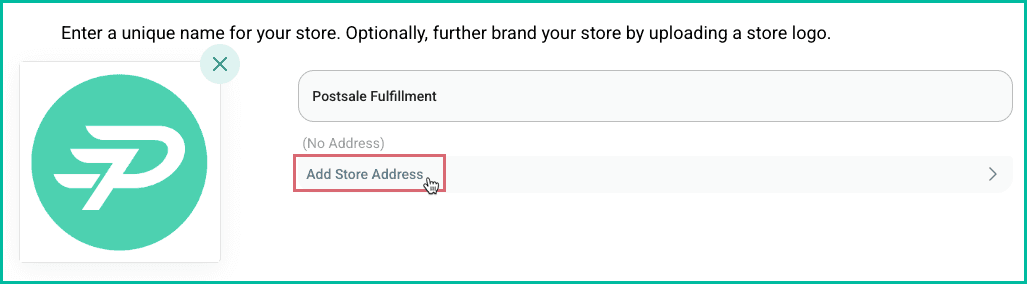
(Optional) Click Add Store Address to add a unique Ship From address from this store. Learn how to configure your Default Shipment settings so that the Store Address is automatically selected as the Ship From address for your shipments.
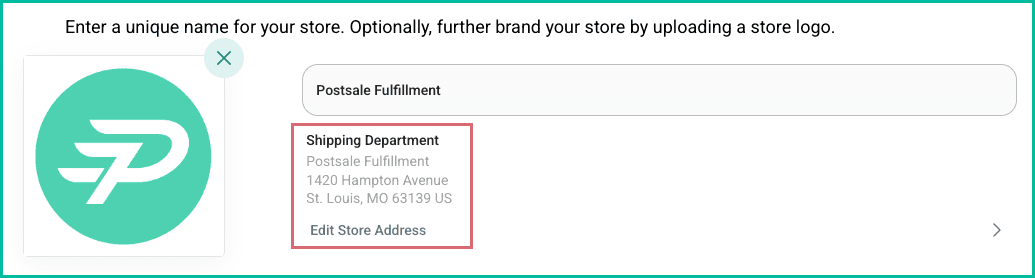
Once added, the Store Address is displayed.
Click Finish to save your webhook as a store connection in Postsale.

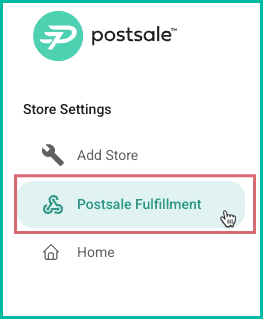
The store is added to Postsale and is displayed in the list of stores in the Store Settings menu.
Still have a question? Ask a person.
Write to support@postsale.com or send us a message. We reply the same business day, Monday to Friday, 8 AM to 5 PM Central.