Enable Branded Tracking
Give your customers a store branded shipment tracking page for their orders.
Branded tracking gives your customers a tracking page that reflects your store when they follow a tracking number from a shipment notification or shipment exception email. Branded tracking is enabled separately for each store so every store can use its own branded landing page.
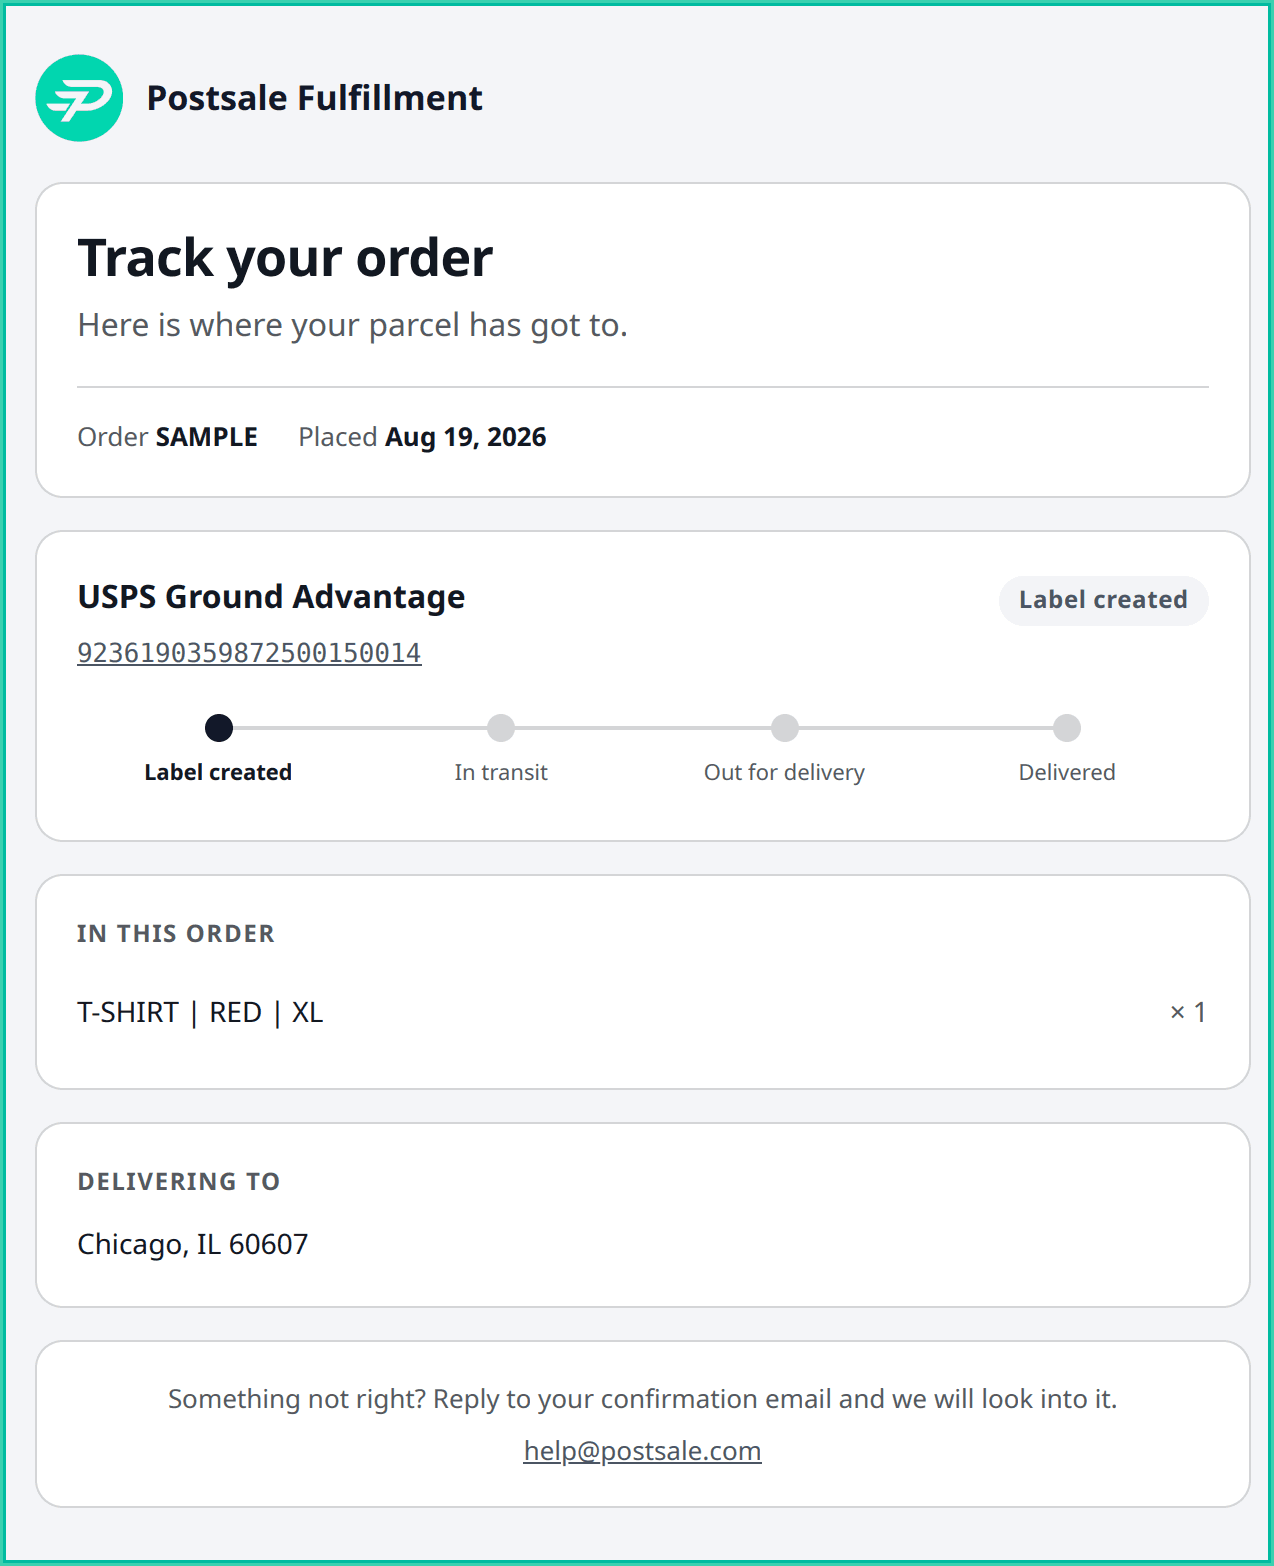
Branded Tracking Page Example
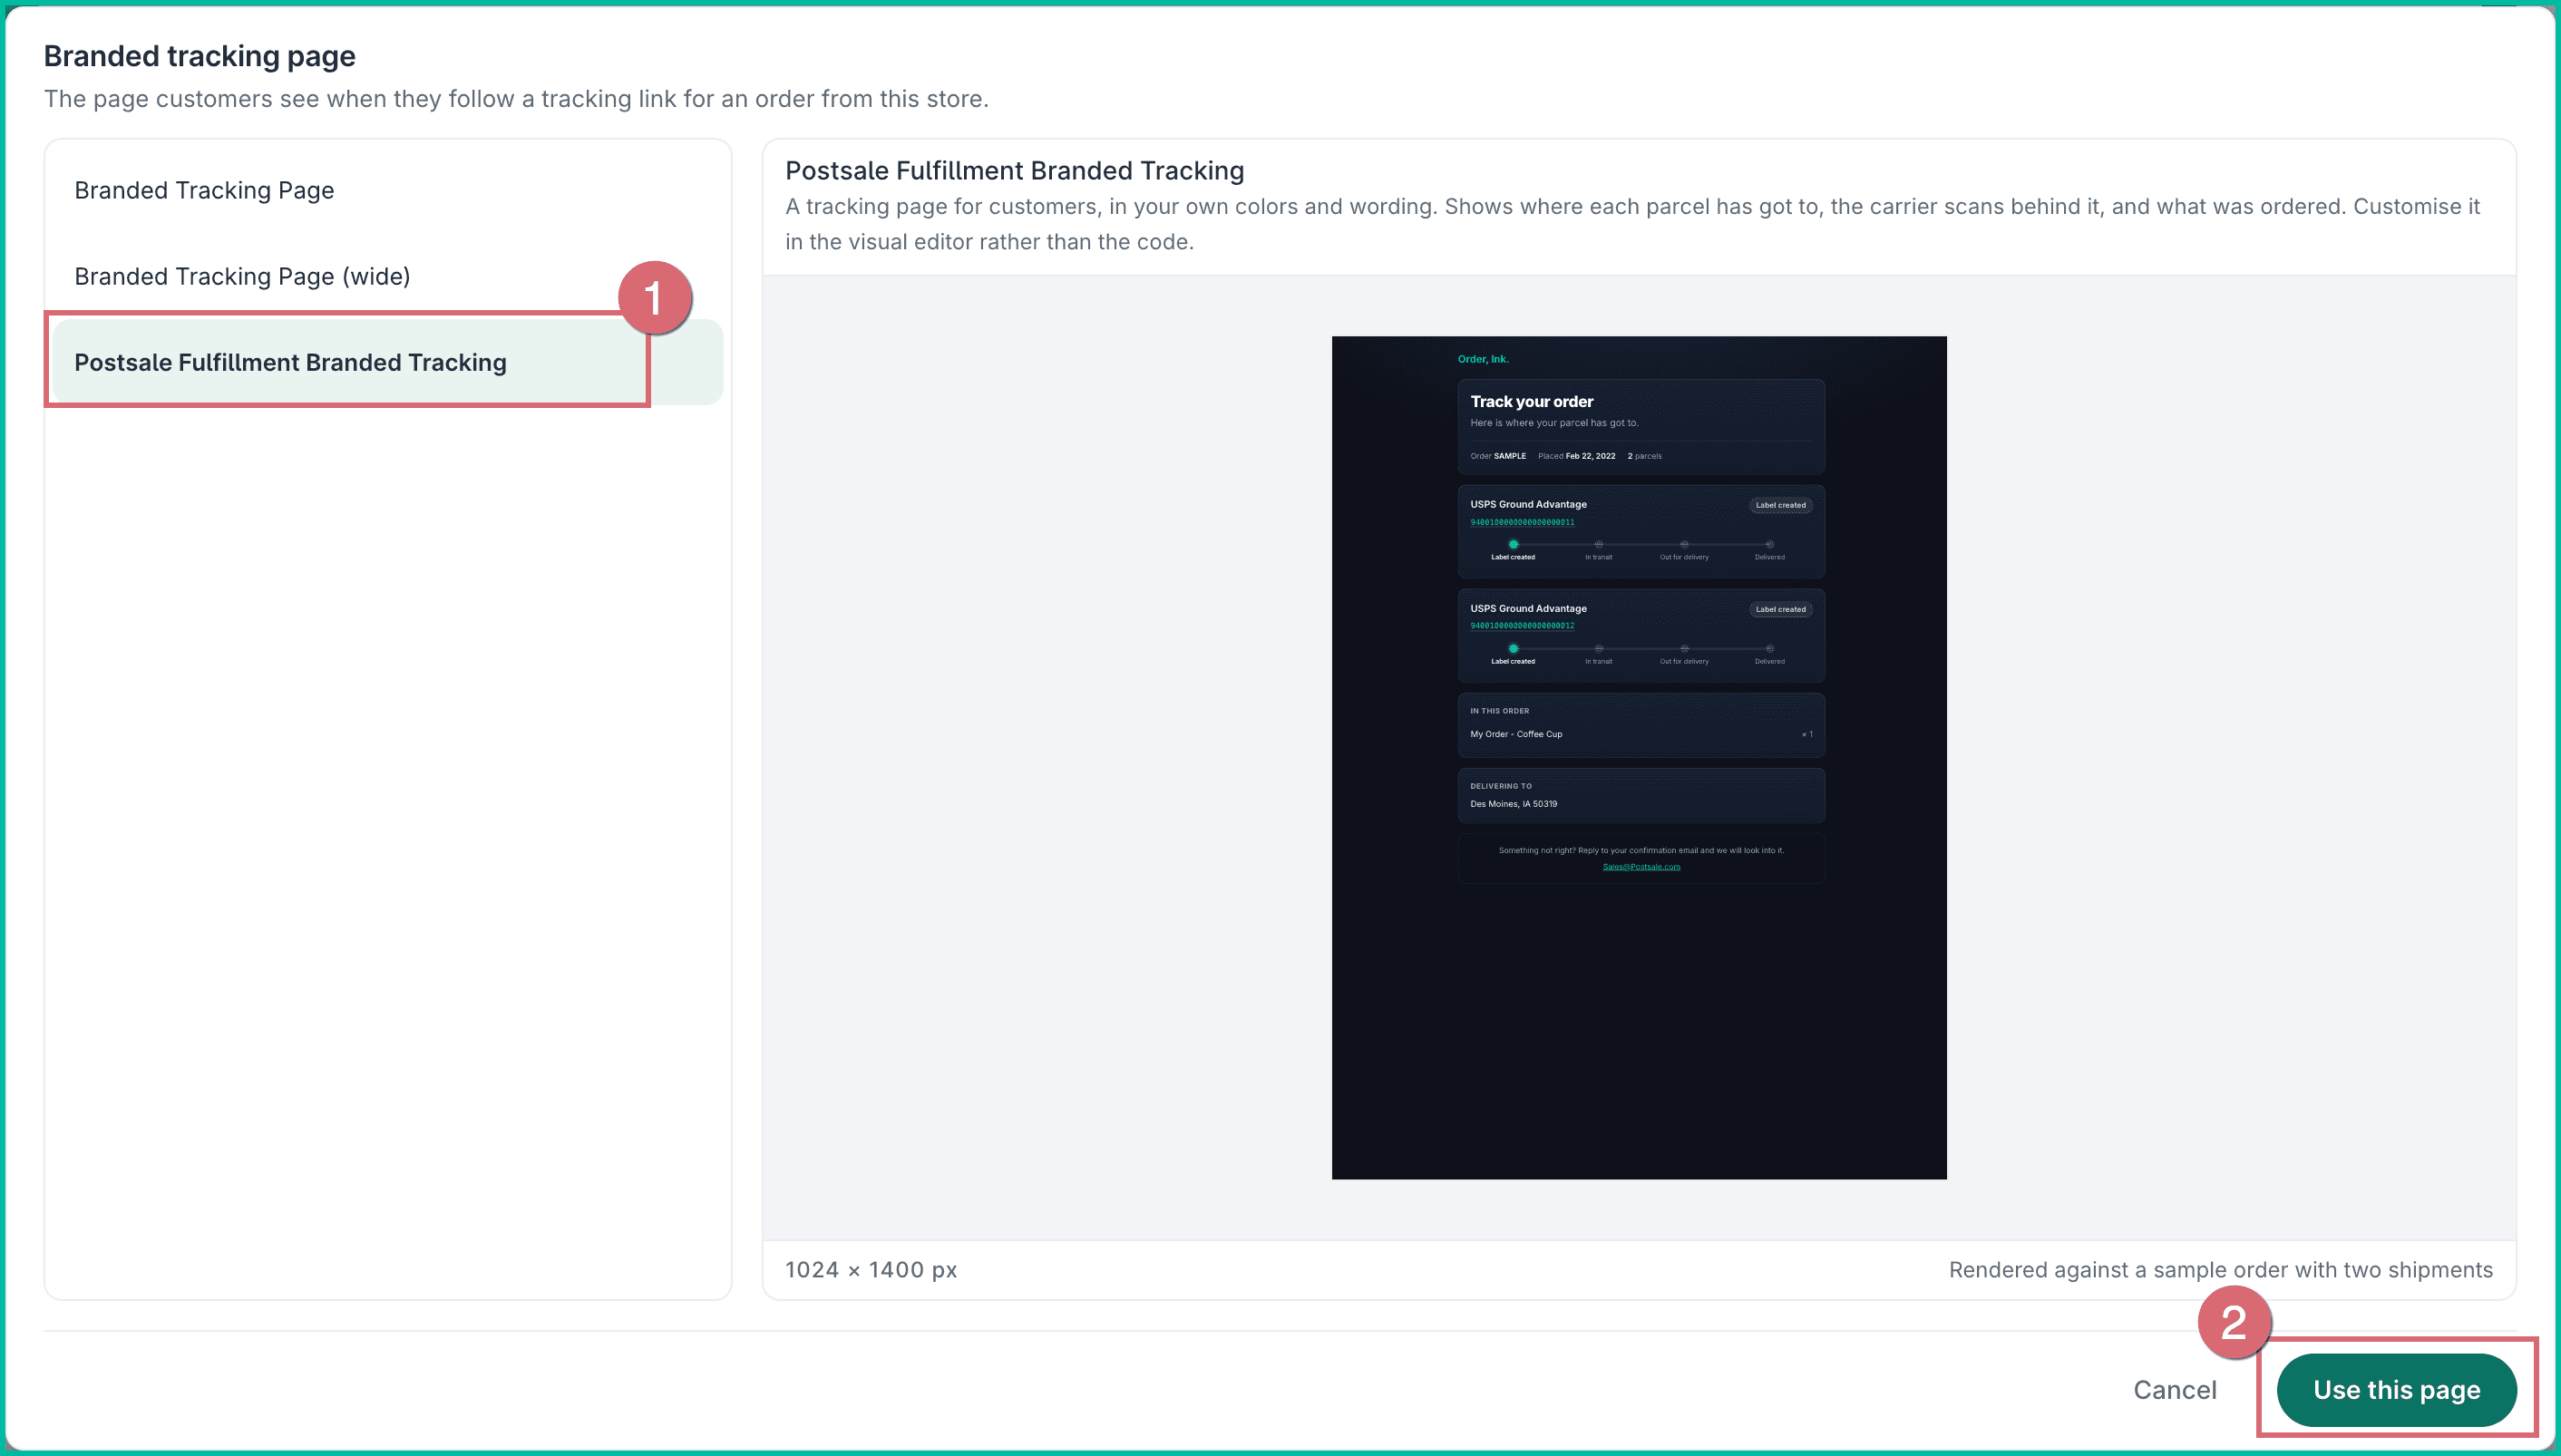
A branded tracking page opens, showing order and shipment progress after your customer selects a tracking number in a shipment notification email you sent them. The page can use the default branded tracking template or a template you have customized for the store. Here is an example of the default branded tracking template.
Before You Begin
- Decide which store you want to configure and which branded tracking template that store should use. You can select a default template or a template customized for that store.
- (Optional) Use the Postsale template editor to edit branded tracking templates with the visual editor or the template code. You can apply your brand colors, images, logo, header image, fonts, and other store-specific content.
Enable Branded Tracking
Real-World Example
We run more than one store in Postsale, and we want customers from each store to see a tracking page that uses that store’s branding. When our customers select a tracking number in their shipment emails, we want the link to open the correct branded tracking page.
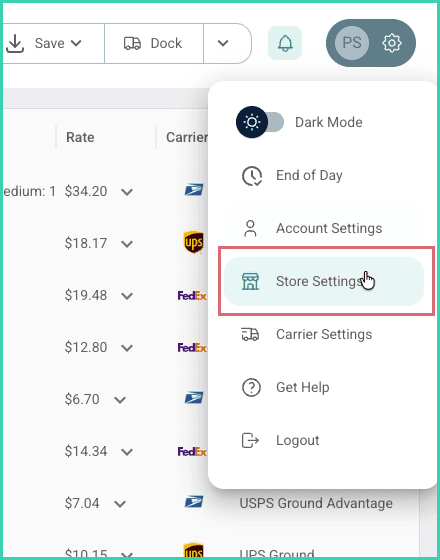
Select the Settings icon. Then select Store Settings.
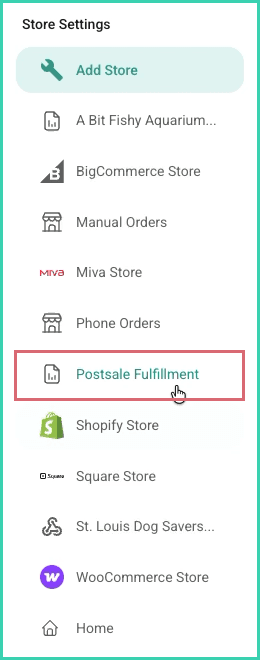
Select the store you want to configure.
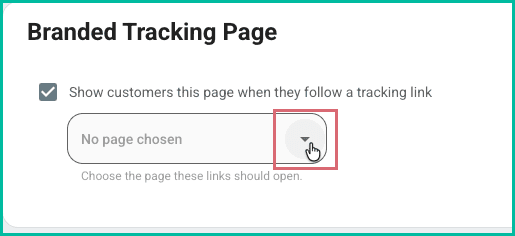
Scroll to the Branded Tracking Page section. Then enable Show customers this page when they follow a tracking link. This setting applies only to the store you selected.
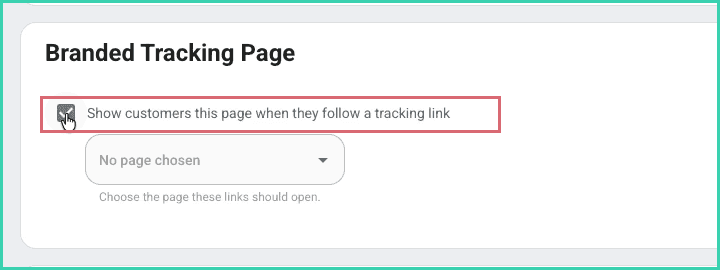
Click the No page chosen drop-down.
Choose the default template or a template customized for the selected store. Review the preview in the pop-up before you apply the page. Then, click Use This Page.
Postsale saves the setting for the selected store. When your customer selects a tracking number in a shipment notification or shipment exception email, Postsale opens that store’s branded tracking page.
On this page
Related