Bulk Edit Multiple Shipments
How to edit multiple shipments and batch process shipping labels
When you're shipping the same product to multiple customers, like a promotional bundle or a restock of your best seller, updating each shipment one by one can quickly become a time drain. Postsale allows you to edit multiple shipments at the same time right in the Dock. Whether you're adjusting weights, adding insurance, or selecting the same package type for all shipments, bulk editing helps you move faster with fewer clicks and fewer mistakes.
In this article, we will look at how to select and bulk edit multiple shipments and how to batch process multiple shipping labels. Learn how to process a single shipping label here.
Real-World Example
We’re preparing to ship out 100 identical packages for a promotion we are running. Each order is going to a different customer, but the box size, weight, and shipping method are exactly the same.
Updating each shipment one by one takes way too long and it's easy to make a mistake when we're doing the same thing over and over. Instead of opening each shipment individually, we need a way to select and update all of them at once.
Bulk Edit Multiple Shipments
Select the orders that you will be editing the shipments for in the Orders Grid.

Open the Dock. Then, make sure that all of the shipments are selected in the Shipments Grid.

About the Dock with Multiple Shipments Selected
Fields Showing ‘Multiple’
When you select multiple shipments in the Dock, any field that contains different values across those shipments like weight, package type, dimensions, or carrier will display Multiple. This simply means the selected shipments don’t all share the same value for that field.
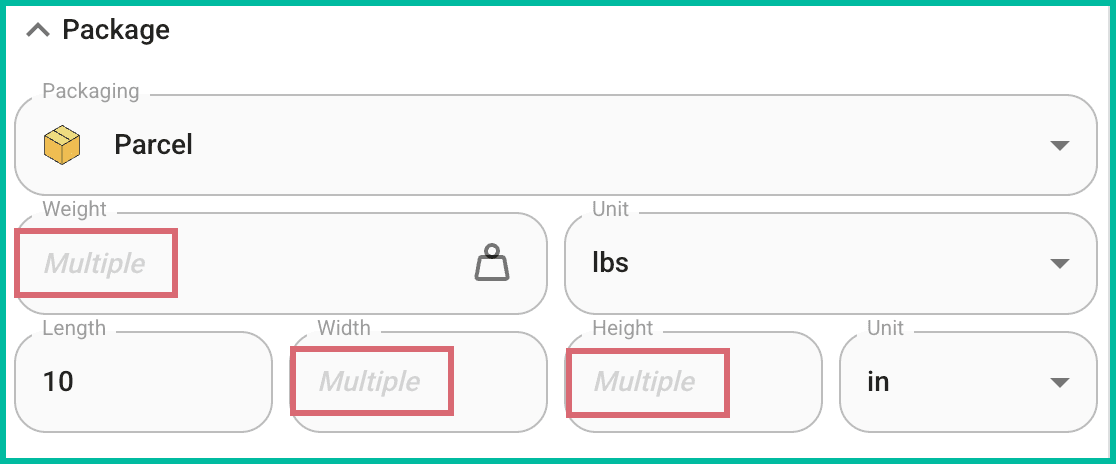
Update any of these fields to apply a single value to all selected shipments at once.
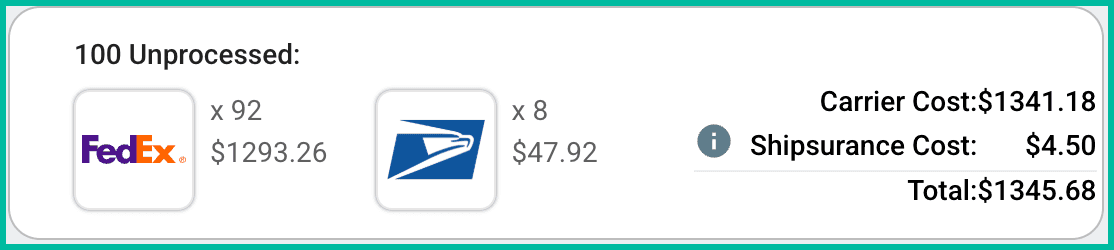
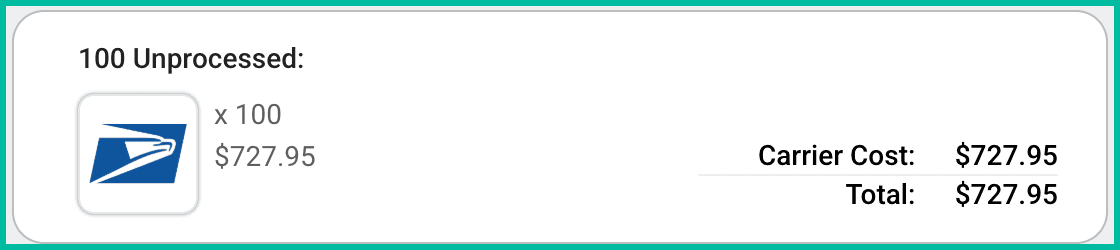
The Rate Selector
When multiple shipments are selected in the Dock, the Rate Selector updates to show the total cost to ship all selected shipments. It breaks down:
- How many shipments will be sent with each carrier
- The total shipping cost per carrier
- Any additional costs, such as insurance
As you make changes to the selected shipment, the Rate Selector updates to reflect the current cost based on your updates. This gives you a clear, itemized view of what you'll spend before you create the labels.
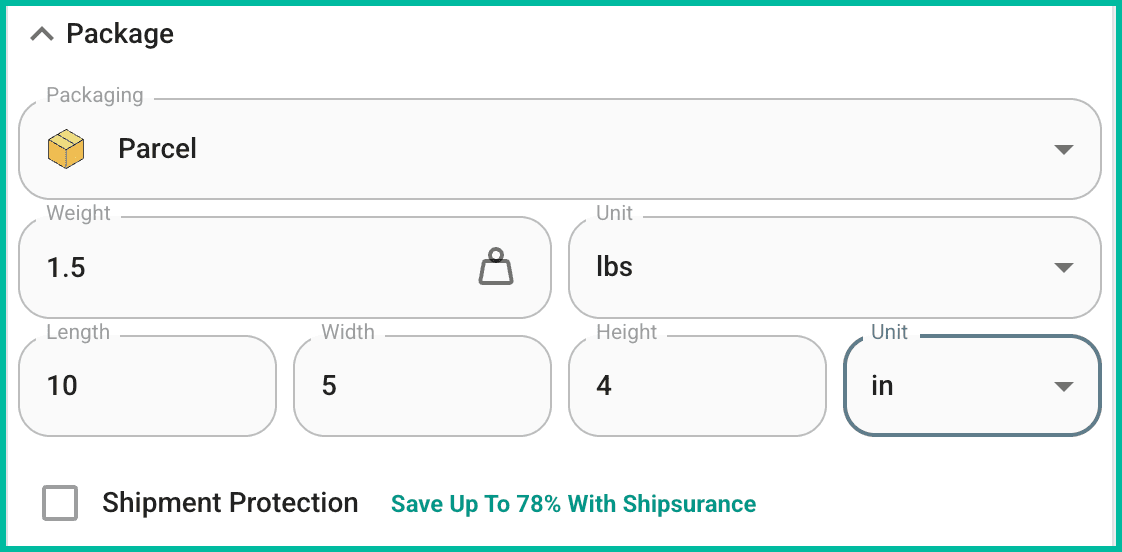
Enter the correct shipment details for your selected shipments. The following fields can be updated:
- Package Section
- Packaging
- Weight
- Weight Unit
- Length, Width, Height
- Dimension Unit
- Shipment Protection
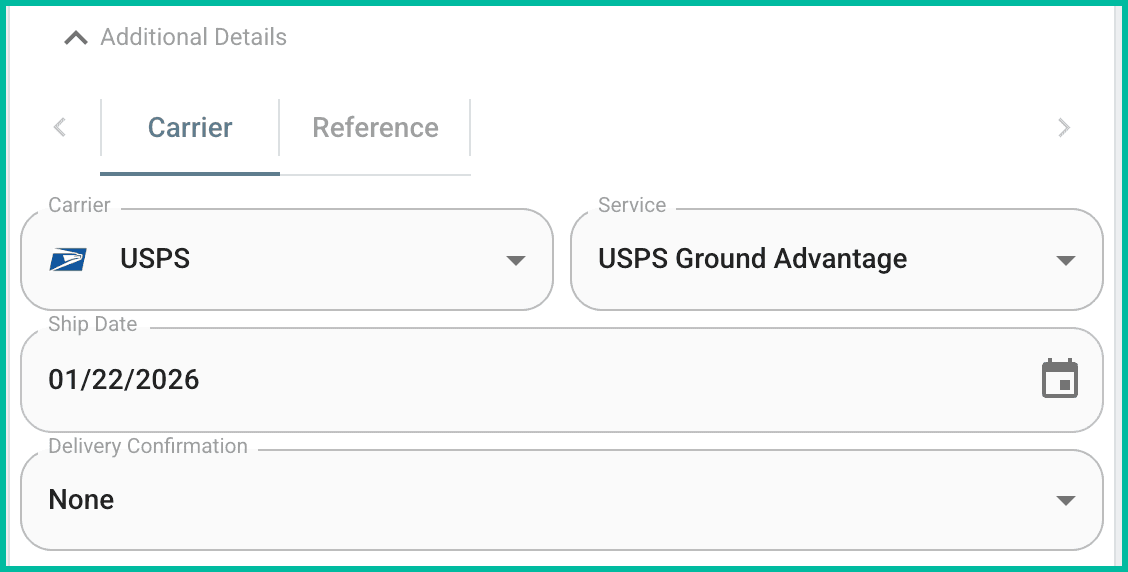
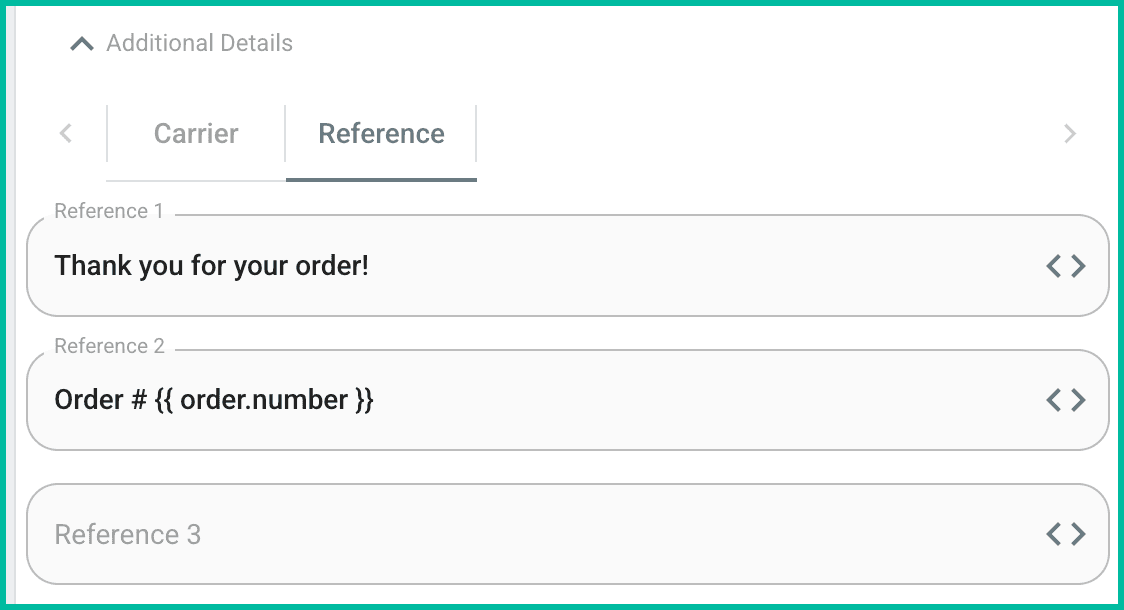
- Additional Details
- Carrier
- Service
- Ship Date
- Delivery Confirmation
- Reference Fields
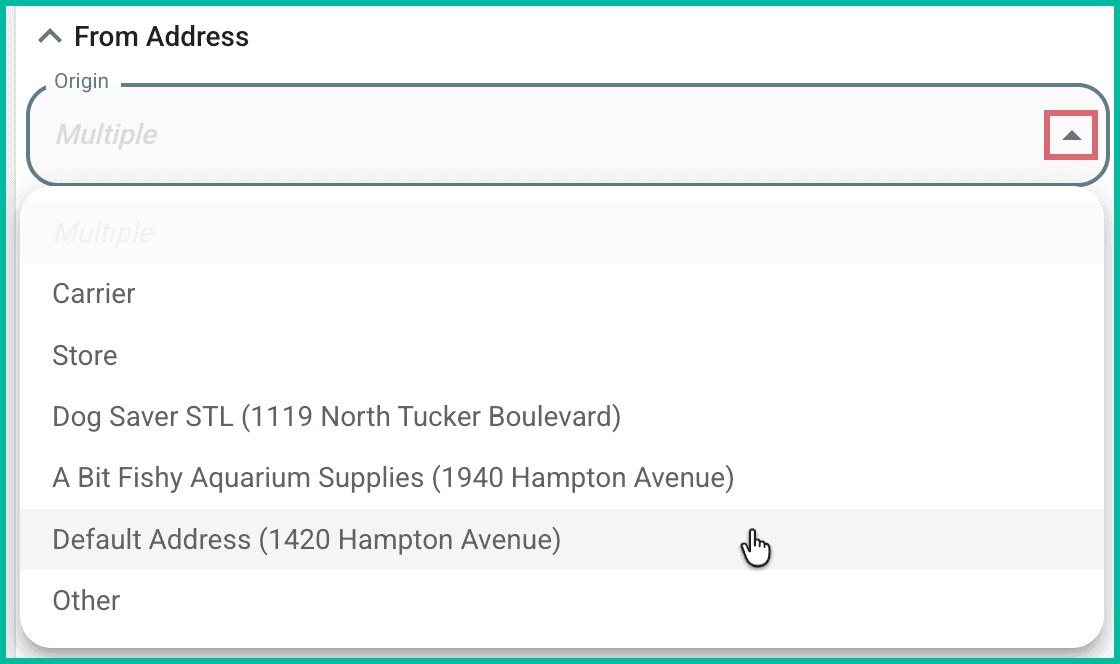
- From Address
- Origin
Once all of the shipment details are updated, you can review the Rate Selector to see your cost to ship the selected shipments.
Create & Print the Shipping Labels
Once you have updated your shipments, you are ready to create your shipping labels.
- Click the Create X Labels button (X = the number of labels to be created).

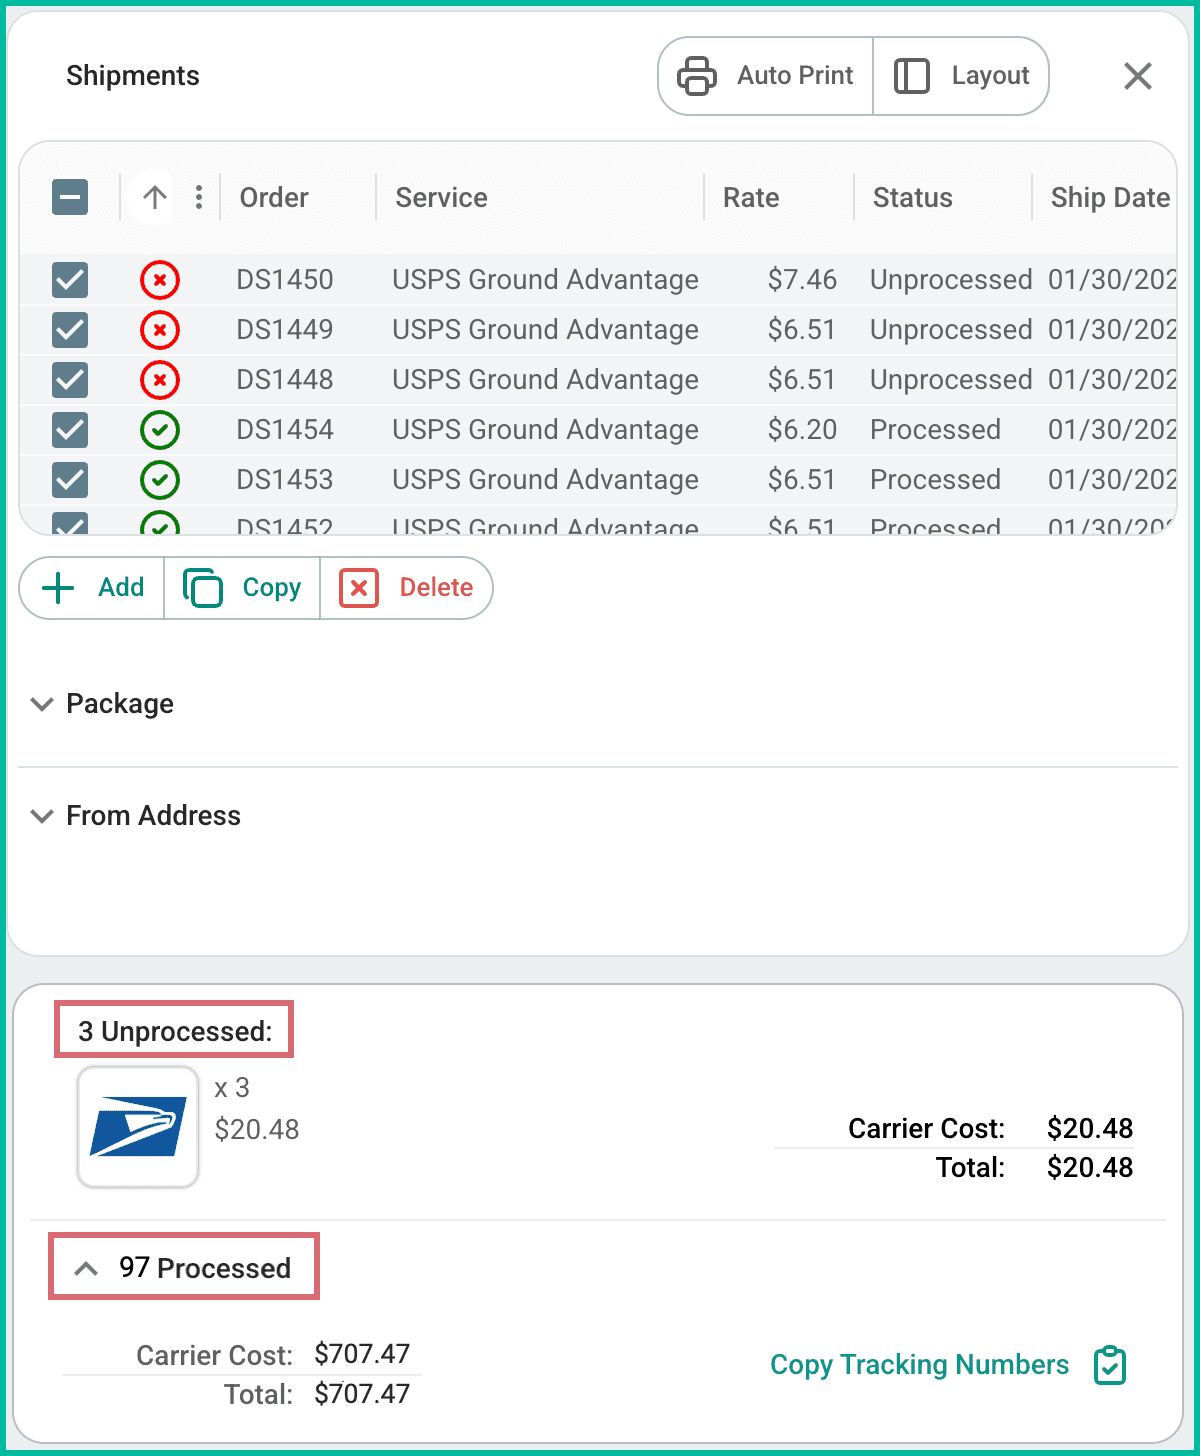
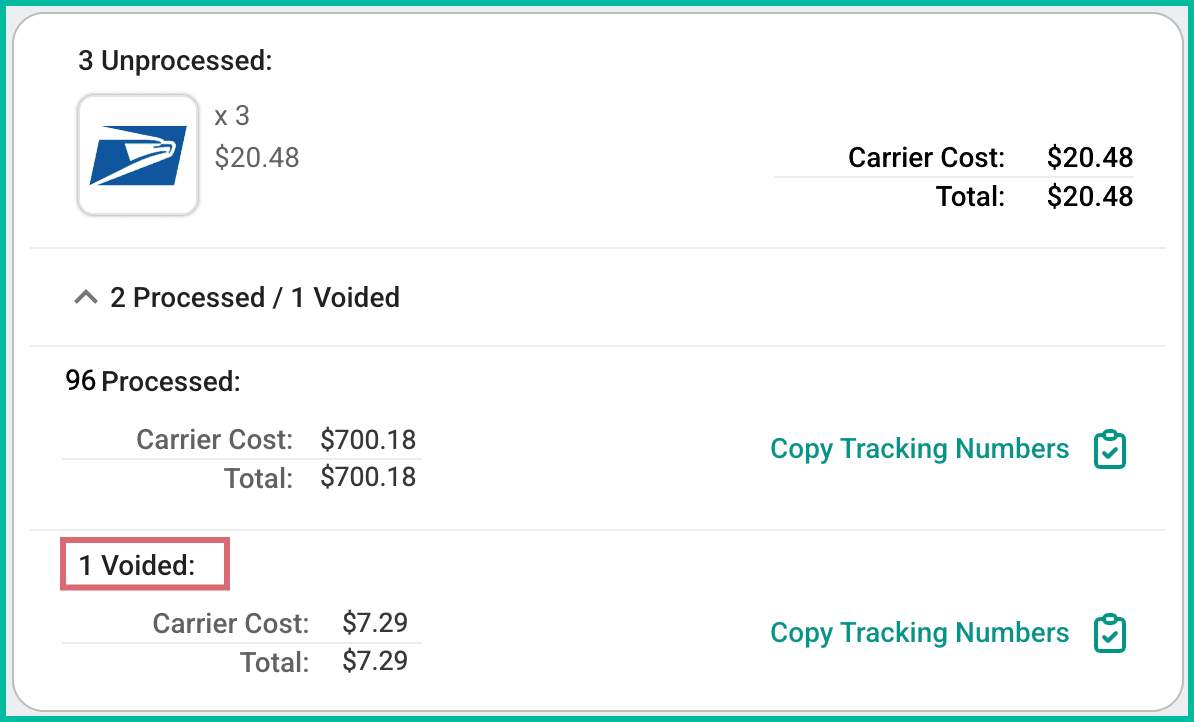
After the labels are created, the Rate Selector automatically updates to show:
- The total number of shipments that were successfully processed
- How many shipments are still unprocessed
This makes it easy to see your overall label costs and to quickly identify any shipments with errors that need your attention.
The Rate Selector also updates to show the total number and cost of any voided shipments.
Select the shipments you wish to print labels for in the Shipments Grid. This is useful when you do not wish to print all of the labels right now, such as when you wish to fix any errors that may have occurred when creating the labels.
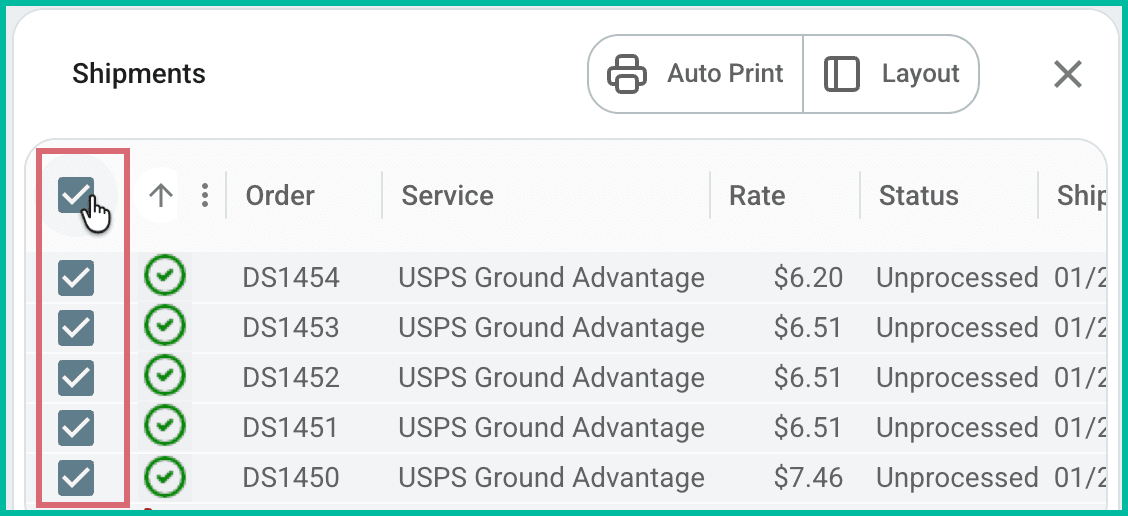
Click the Print X Labels button (X = the number of labels to be printed) to print the shipping labels. Your web browser's print window will open. The labels will be displayed and will print in the order they appear in the Shipments Grid in the Dock.

Auto Print
The Auto Print button, when enabled, tells Postsale to open your web browser's print dialog as soon as labels are created so that they can be printed. In some cases, you may need to follow the steps for your specific web browser to allow Postsale to open pop-up windows.

On this page
Related