Import Tracking and Shipment Information from a File
Learn how to import tracking numbers and shipment details from a CSV file for labels you bought outside Postsale, and how to fix any problems before you import.
Use Import Tracking to add tracking numbers and shipment details, such as the carrier and service, to your orders from a CSV file for labels you bought outside Postsale.
In this article, we will:
- Select your CSV file.
- Map the columns in your file to Postsale's fields.
- Match the carriers and services in your file to the ones in Postsale.
- Preview the import, fix any problems, and import the file.
Before We Begin
- You need at least one order in Postsale. If the order already has a shipment without a label, Postsale adds the information you import to that shipment. Otherwise, Postsale adds a new shipment.
- You need to be logged into Postsale as the account owner, as a Manager, or as a user assigned the following permissions:
- Create Shipments
- Read Stores
- To enter the tracking for one shipment by hand, see Manually Enter Tracking for a Shipment.
Things You Will Need
Let's make sure that you have everything you need to get started:
- Your CSV file, with one row for each shipment. Each row needs an order number, a carrier, and a tracking number. It can also have a service, ship date, and cost.
- Our Format Your File for Success help article covers the basics of creating and formatting a CSV file.
Import Tracking from a File
Select Your File
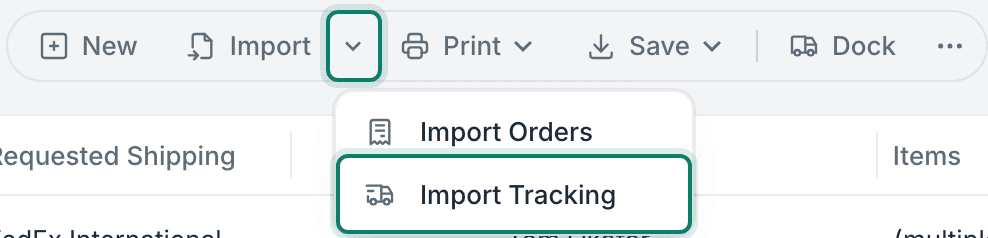
Click Import in the Order Actions Menu. Then, select Import Tracking.
The Import Tracking pop-up opens.
Select your CSV file using one of the following methods:
a. Drag and drop your file from your computer into the drag and drop area.
b. Click in the drag and drop area. Then, navigate to your file and select it.
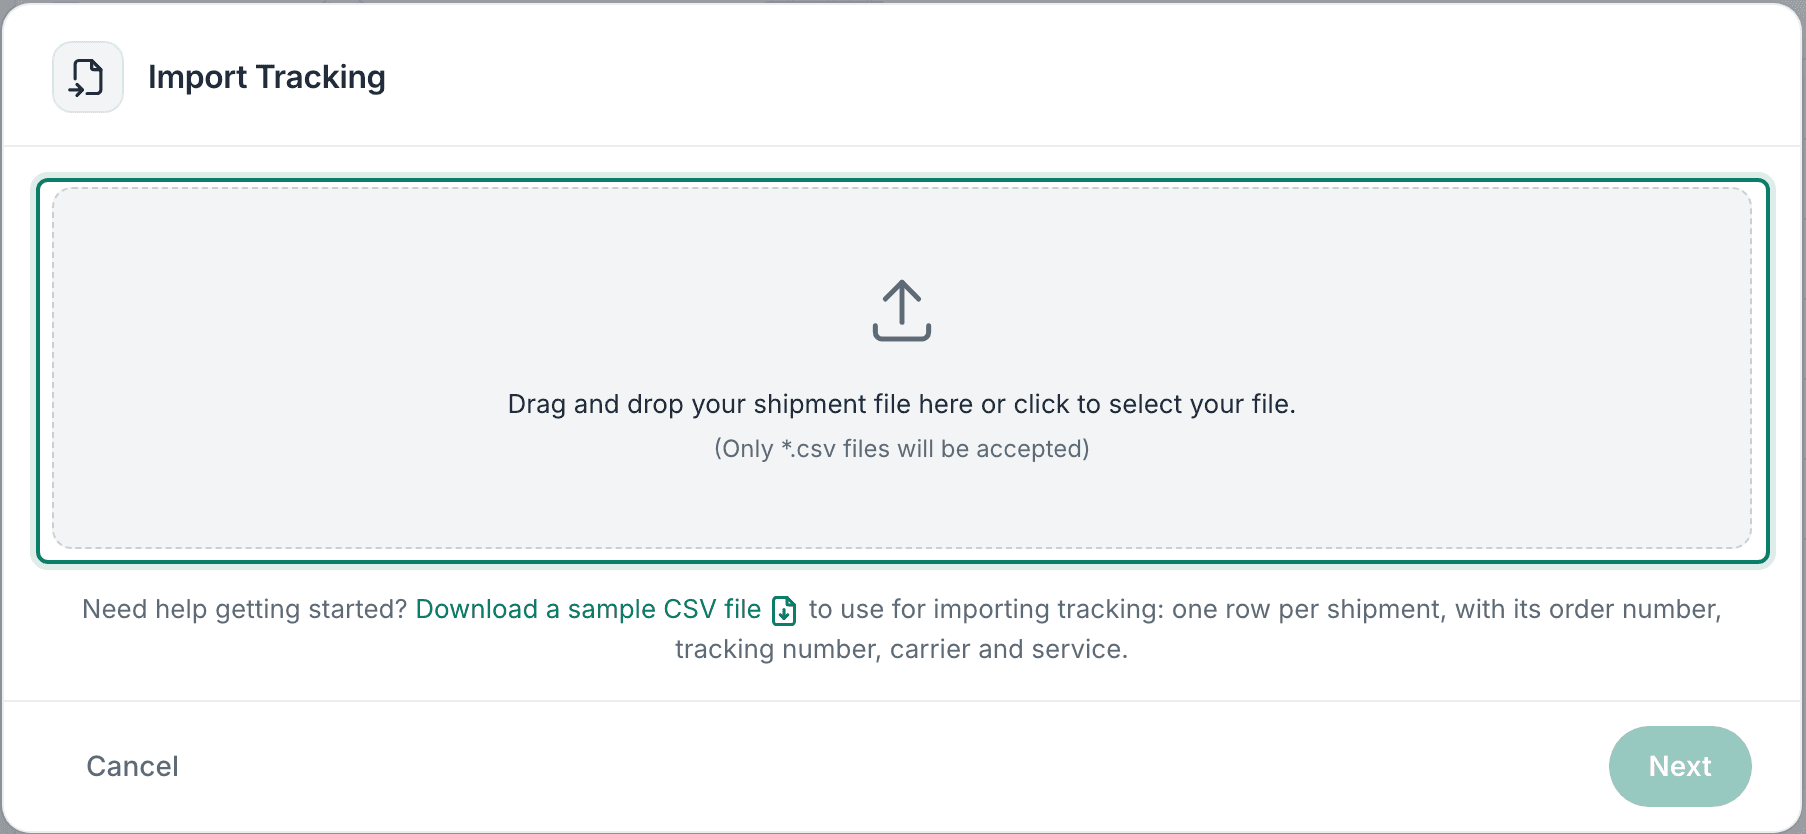
After selecting your import file, you are automatically taken to the Map Columns screen.
Map Your Columns
On the Map Columns screen, choose the store that the orders belong to from the Store drop-down menu. Postsale matches the order numbers in your file to this store's orders.

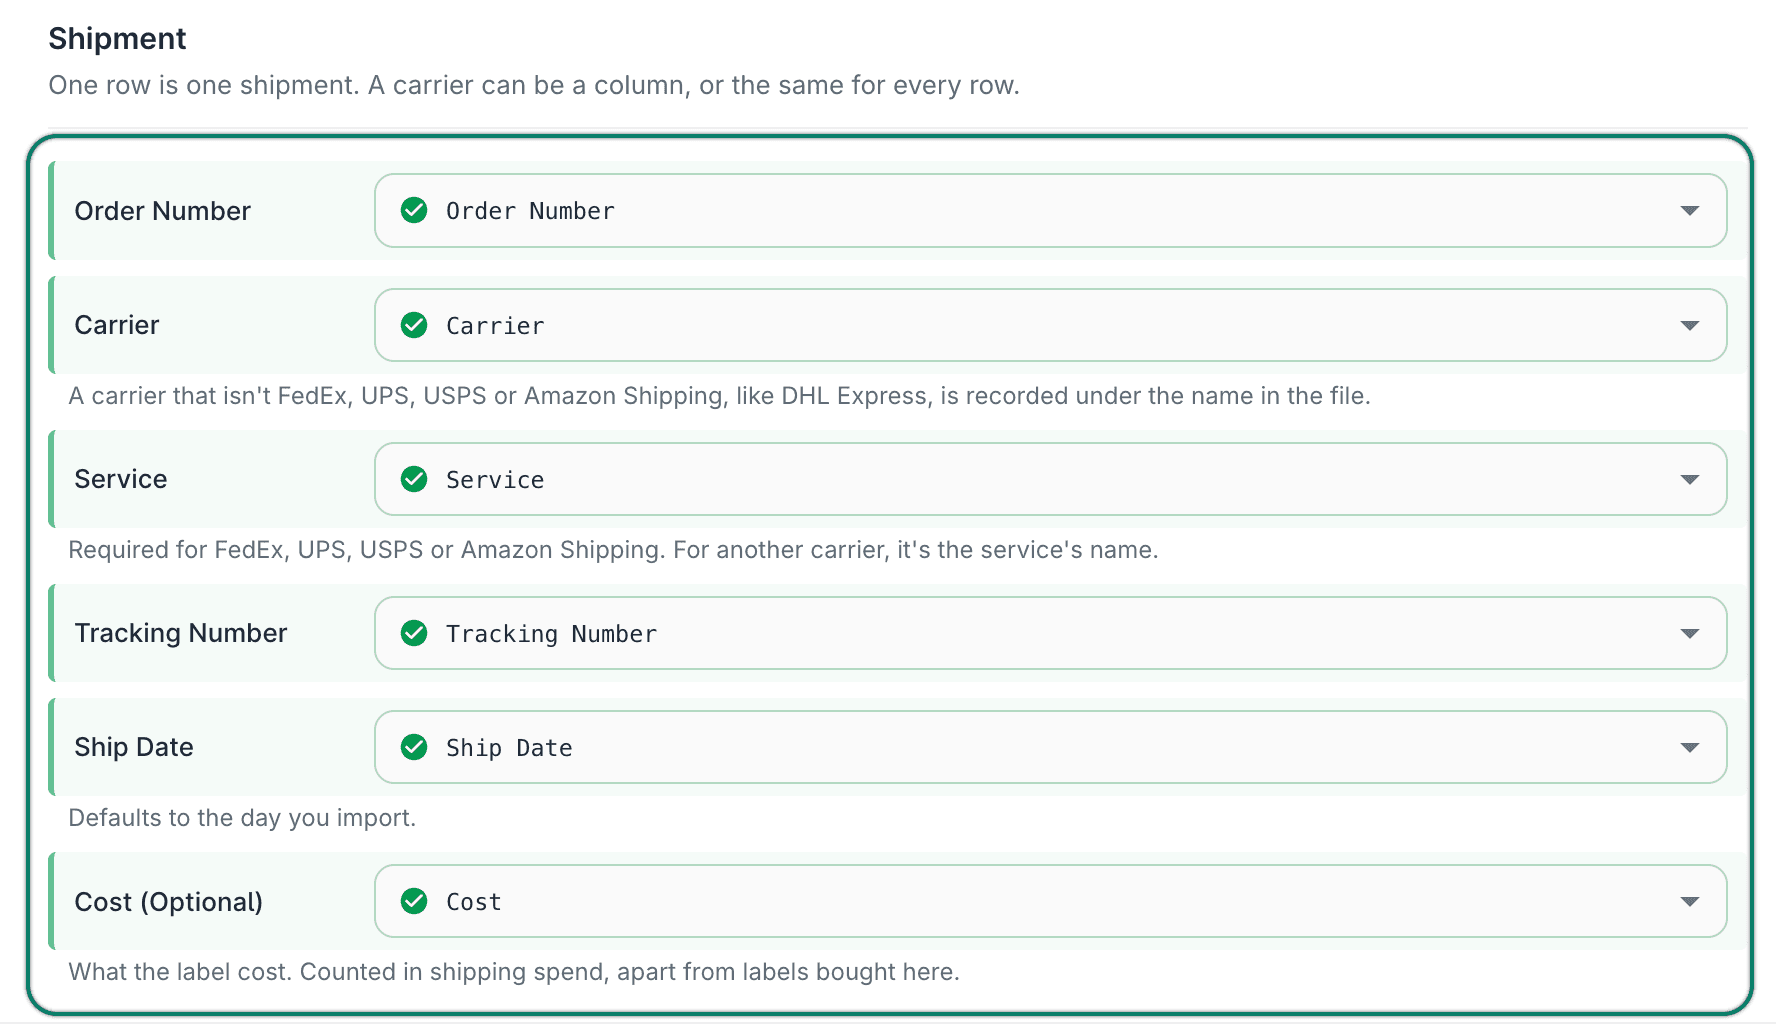
For each Postsale field, select the matching column from your file in the drop-down menu. One row is one shipment. Order Number, Carrier, and Tracking Number are required.
- Order Number: Required. Select the column in your file that contains the order numbers.
- Carrier: Required. Choose the column from your file that specifies the carrier.
- You can also select Every row is and pick a carrier when every shipment uses the same carrier.
- Tracking Number: Required. Select the column in your file that contains the tracking numbers.
- Service: Optional. Select the column in your file that contains the service used.
- Ship Date: Optional. Select the column in your file that contains the ship date.
- Cost: Optional. Select the column in your file that contains the cost of the shipments.
Click Next.
Match Values
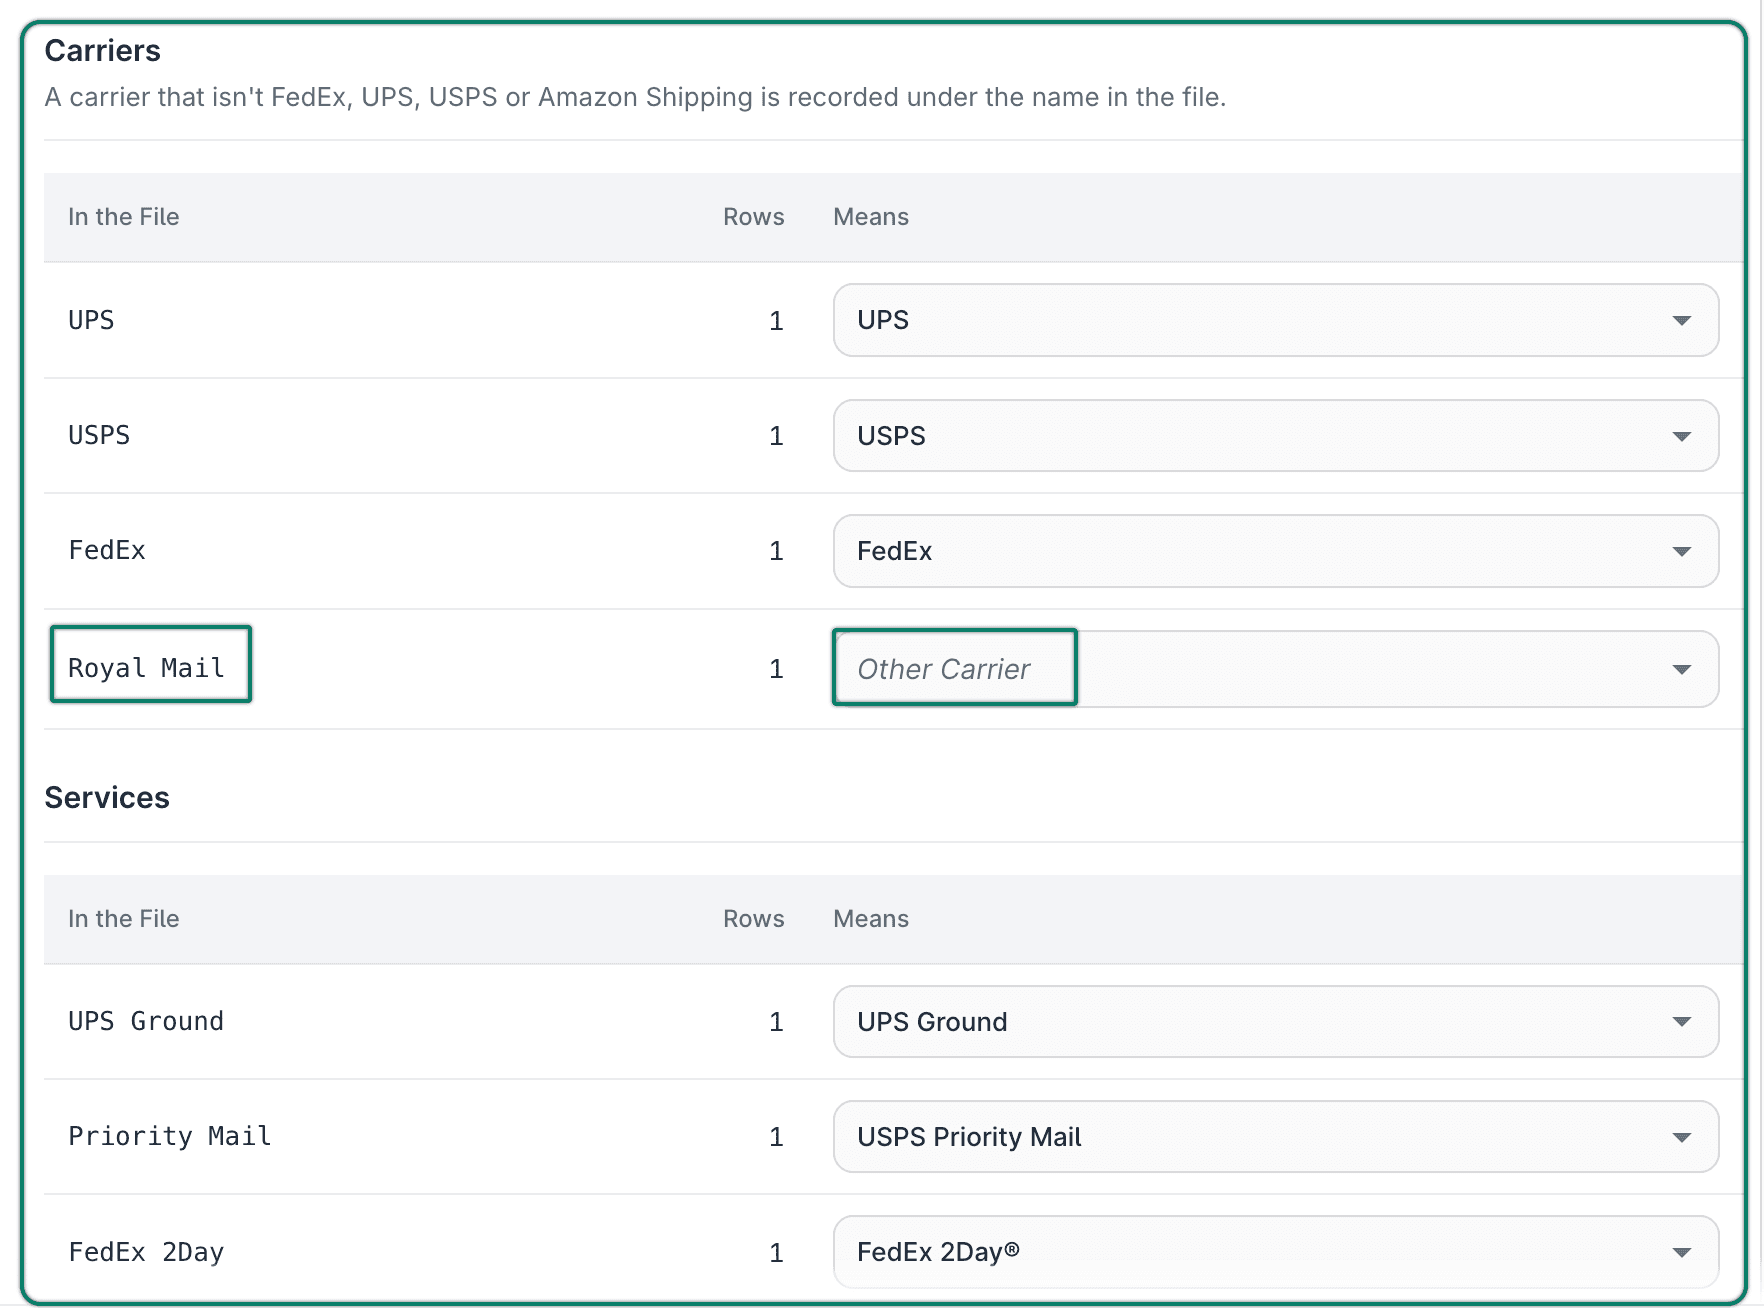
On the Match Values screen, match each carrier and service from your file to a carrier and service in Postsale. Select the values from the drop-down menus.
- This helps when your file spells a carrier or service differently from Postsale or has a typo. For example, your file might list USSP instead of USPS. Match USSP to USPS so that it shows correctly in Postsale.
- Leave a value set to Other Carrier only for a carrier Postsale doesn't work with, such as Royal Mail. The value is recorded in Postsale as shown in the file and isn't tracked. The image below shows Royal Mail left as Other Carrier.
Click Next.
Preview and Import
Review the information on the Preview screen to ensure the file will import as intended. See The Preview Screen below for details about the information shown and how to fix potential issues.
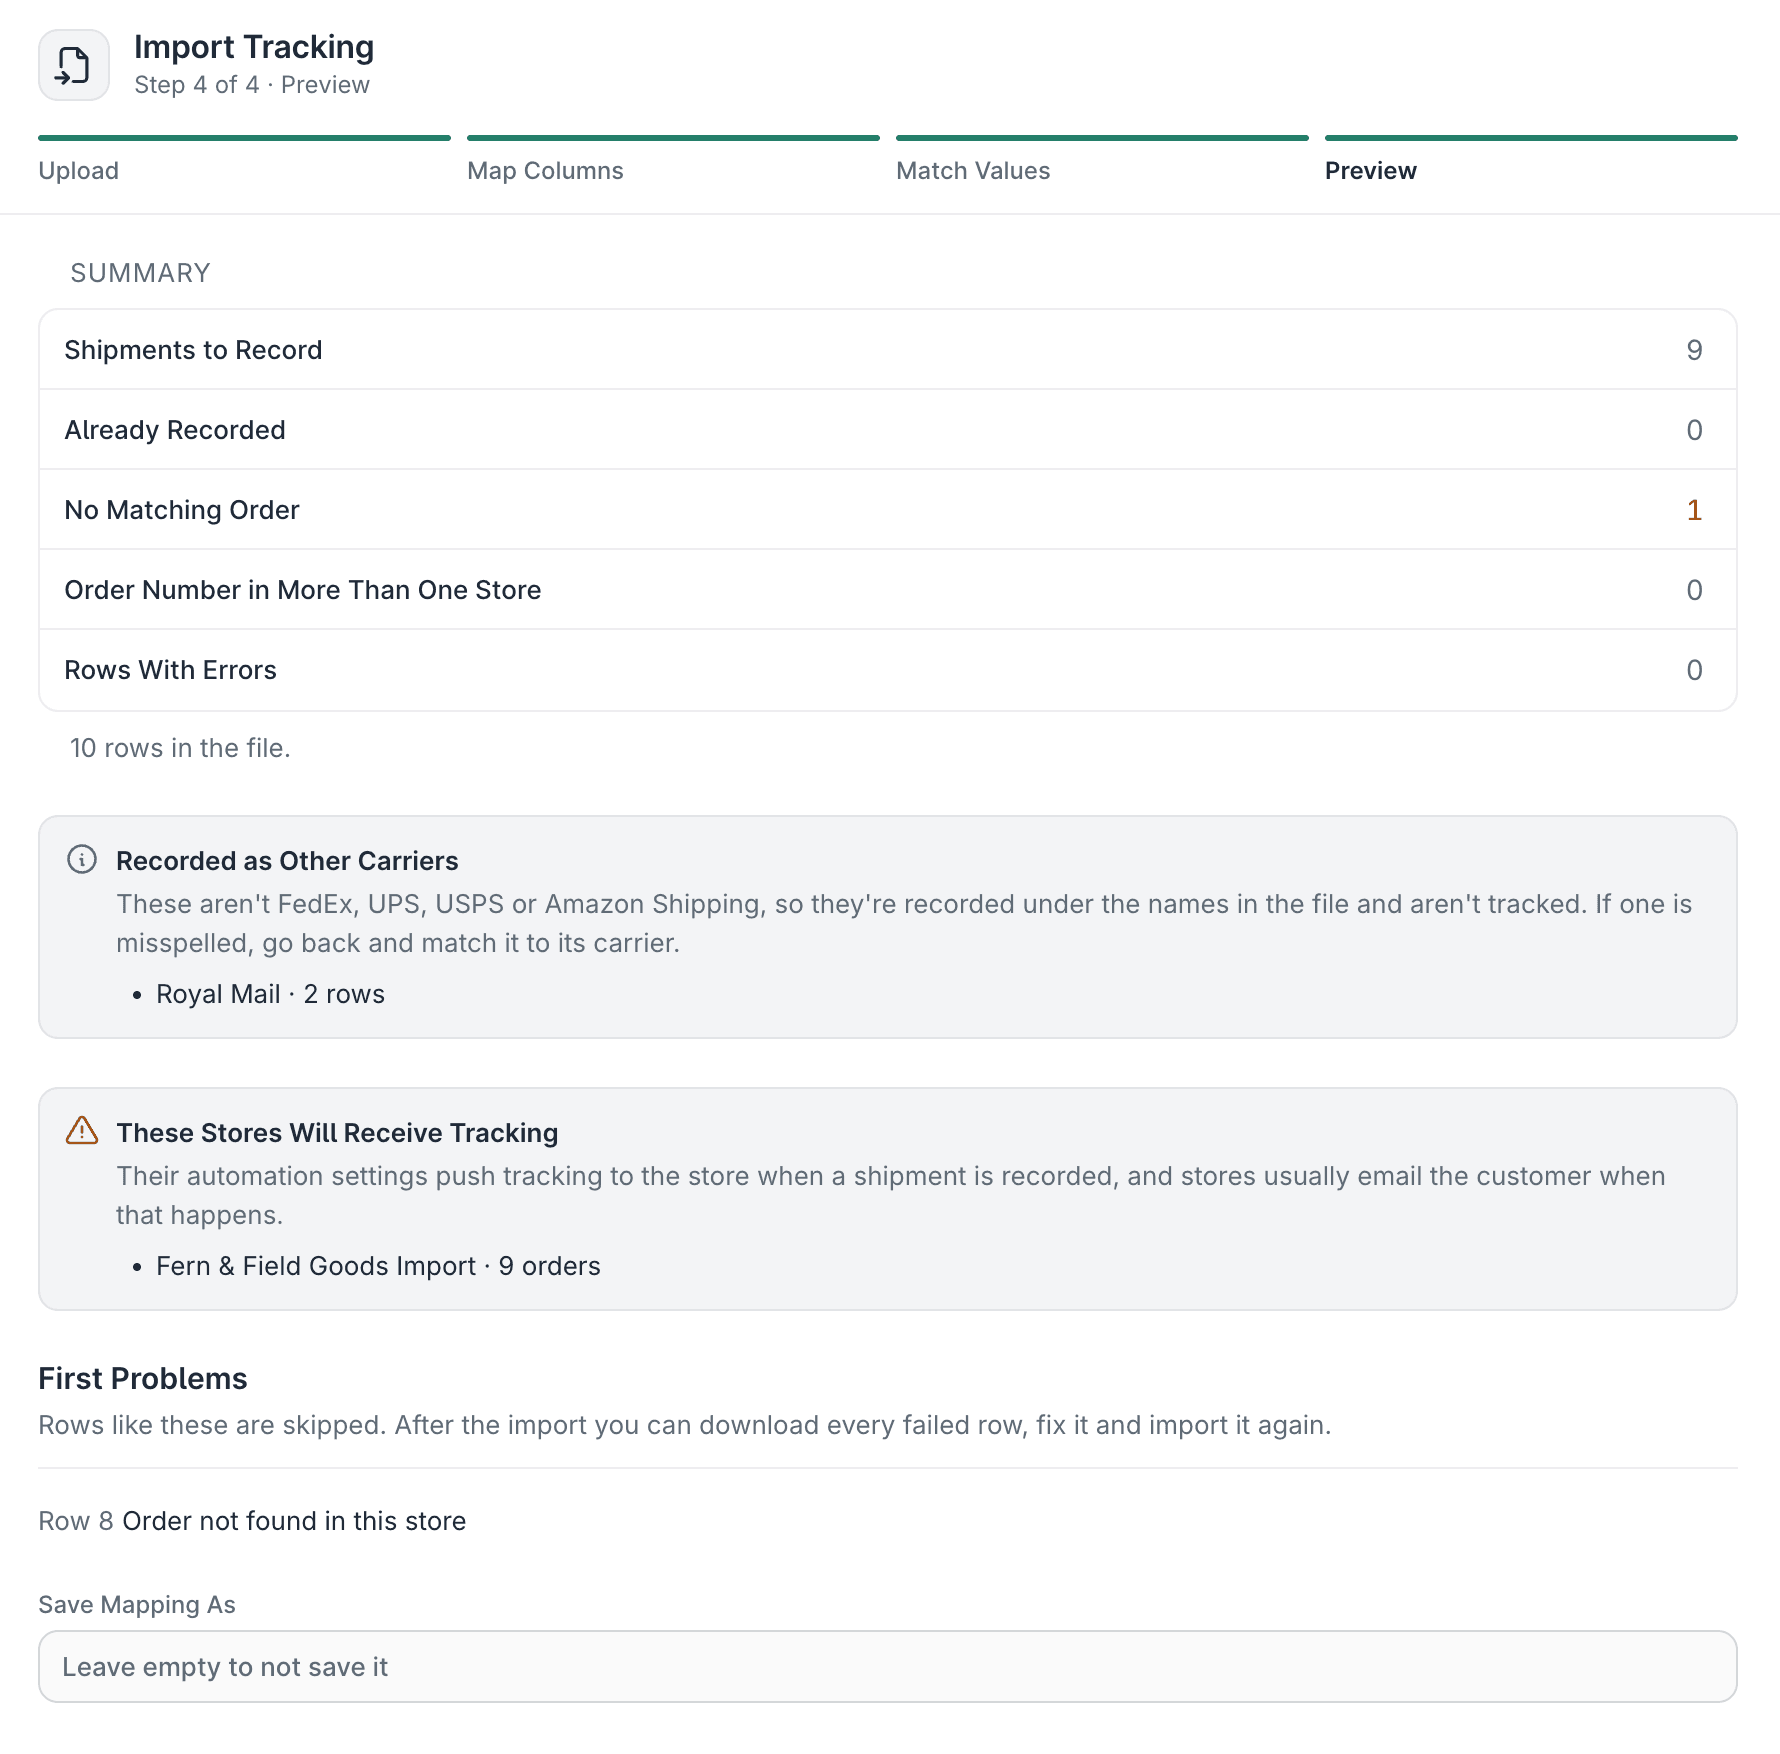
The preview identifies one row (row 8) that does not match an order in Postsale. Choose whether to save your mapping for next time. Enter a name in Save Mapping As, or leave it empty to not save it.

Select Import Tracking to import the file.
Good to Know
- Postsale uses the Order Number to match each row in your file to an order in Postsale.
- A row is skipped with "Order not found" when no order has that number.
- A row is skipped when two orders in the store have the same number, because Postsale can't tell which one is meant.
- A combined order matches by its main order's number, and the tracking goes on the combined order.
After You Click Import Tracking
- If the order already has a shipment without a label, Postsale adds the tracking to that shipment. Otherwise, it adds a new shipment.
- Postsale counts several rows with the same order and tracking number as one shipment.
- Postsale turns the same tracking number on two different orders into one shipment on each order, such as when two orders are packed in one box.
- Postsale skips a tracking number the order already has, so importing the same file again doesn't record anything twice.
- Postsale sends tracking based on the store's automation settings, the same as when a label is created in Postsale.
The Preview Screen
The summary shows:
- Shipments to Record: The rows that match an order and will be recorded.
- Already Recorded: The rows whose order already has that tracking number. These rows are skipped, and nothing needs fixing.
- No Matching Order: The rows whose order number matches no order in the store you chose. They appear in red when any exist.
- Order Number in More Than One Store: Despite the name, these are rows whose order number matches more than one order in the store you chose, so Postsale can't tell which one is meant. They appear in red when any exist.
- Rows With Errors: The rows that can't be read, such as a row with no tracking number. They appear in red when any exist.
If service values are still unmatched, a red line says "Go back to match them, or their rows won't be imported."
The Preview can also show:
- Recorded as Other Carriers: Carrier names from your file that aren't FedEx, UPS, USPS or another carrier Postsale works with. They are recorded under those names and aren't tracked. This is your last chance to catch a typo such as "UPSS".
- These Stores Will Receive Tracking: Each store whose automation settings send tracking back, along with its order count.
- First Problems: Up to 10 skipped rows, each with its row number and the reason.
To fix what the Preview shows:
- No Matching Order: Check that you chose the right store and matched the right column to Order Number on the Map Columns screen. Then check that the numbers in your file match how they're written in Postsale. The order must also be in Postsale and not deleted.
- Order Number in More Than One Store: The import skips these rows. Use Enter Tracking to add their tracking one at a time.
- Rows With Errors: Use the reasons under First Problems to fix those rows in your file, then upload it again. Or import now, then fix the rest using Download Failed Rows in the import notification (see the Check Notifications note in the steps above).
- Recorded as Other Carriers: If a name there is a typo or a carrier Postsale works with, go back to the Match Values screen and match it to the right carrier. A carrier Postsale doesn't work with, such as Royal Mail, can stay as it is.
- A red line about unmatched service values: Go back to the Match Values screen and match each value to the right service.
- These Stores Will Receive Tracking: The import has no switch to stop this. Each store's own automation settings decide it, so change those first if customers shouldn't get emails for these shipments.
Still have a question? Ask a person.
Write to support@postsale.com or send us a message. We reply the same business day, Monday to Friday, 8 AM to 5 PM Central.